In Fullcast, the term Role refers to the roles that people hold in a given territory. In Sales, for example, common roles are Account Executive, Account Manager, Sales Manager, and so on. You can create a role for any employee who is involved in your processes or teams.
After you create a territory, the next step is to assign people to the territories. In Fullcast, this requires you to configure roles and then assignments. Create, manage, and assign various types of roles in your go-to-market plans.
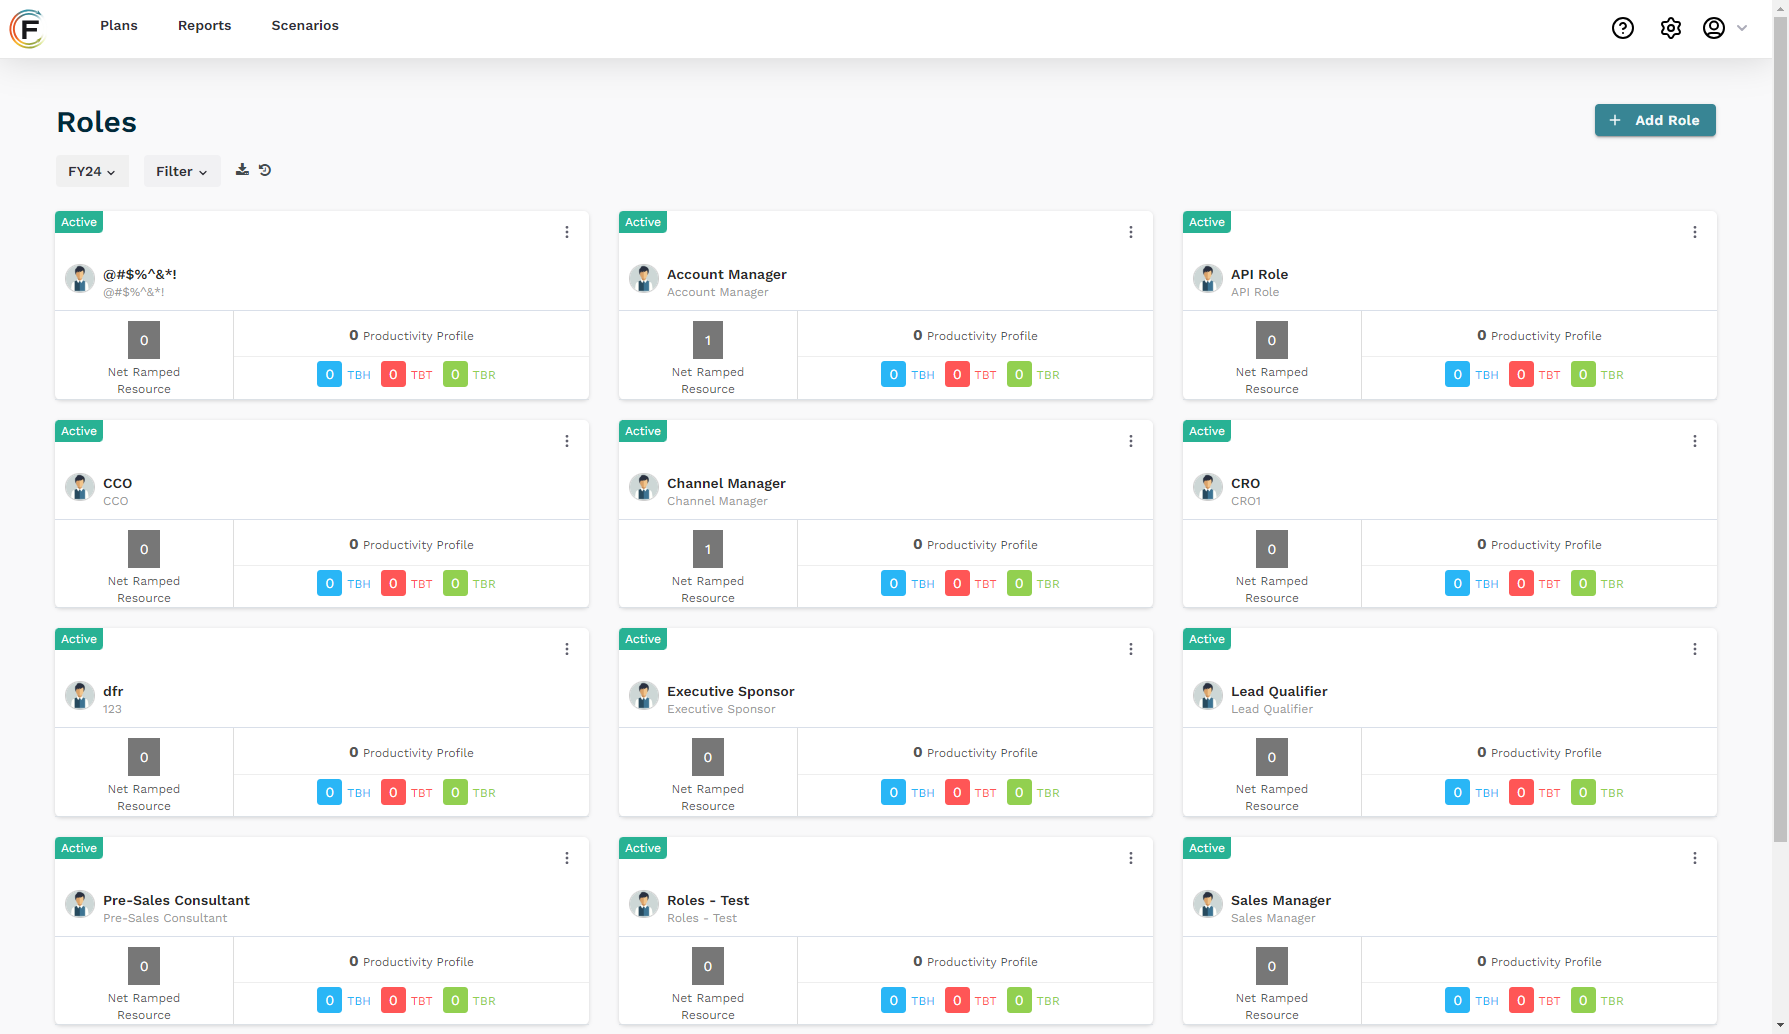
Roles page
.png)
Search—dynamically filters results as you type your search.
Filters—filter by fiscal year, status, and type.
Action—access add role, export roles, and view audit logs.
Name and description—role name and role description.
Status:
Inactive—the role is not currently activate or has not been activated.
Active—the role is active.
Retired—the role has been deprecated and is no longer available.
Type—Non-Commission, Commission, or Support
Profiles—the total number of ramp profiles in the role.
Open Headcount—the number of assignments in TBH, TBT, and TBR status.
Productivity—the total number of productivity profiles in the role.
Menu—access edit, retire, recalculate ramp profile, and audit logs.
Note:
To learn more about creating assignments, refer to the Creating TBx (TBH, TBT, TBR) Assignments and Creating Normal and Temporary Assignments.
Role access types
Configure access type for each module to customize the permissions for that role. Refer to the following for a description of the available access types:
Read Only—user can only view information and cannot make changes.
Read Write—user can view information and make changes.
Read Write (Only Tenant Administrator)—only users designated as tenant administrators can view and make changes. You cannot change this access type.
Denied—user cannot access the information and it is hidden.
True—user has access to perform the specified action.
False—user does not have access to perform the specified action.
After you create a Territory Plan in Fullcast, the next step is to assign people to the territories. In Fullcast, this requires you to set up Roles and then Assignments. Fullcast allows you to create, manage, and assign various types of roles in your go-to-market plans.
This article provides an overview of Roles in Fullcast, linking to relevant how-to guides, where appropriate.
Roles designer
Sales team members are associated with a myriad of go-to-market aspects. As shown in the picture, a specific target gets assigned to a particular role. A person gets assigned to a role and inherits the assigned target with it. Then, you can set the role onto a specific go-to-market Hierarchy node— a segment or territory, team, product portfolio, or channel. Roles contribute significantly to your go-to-market strategy and sales operations.
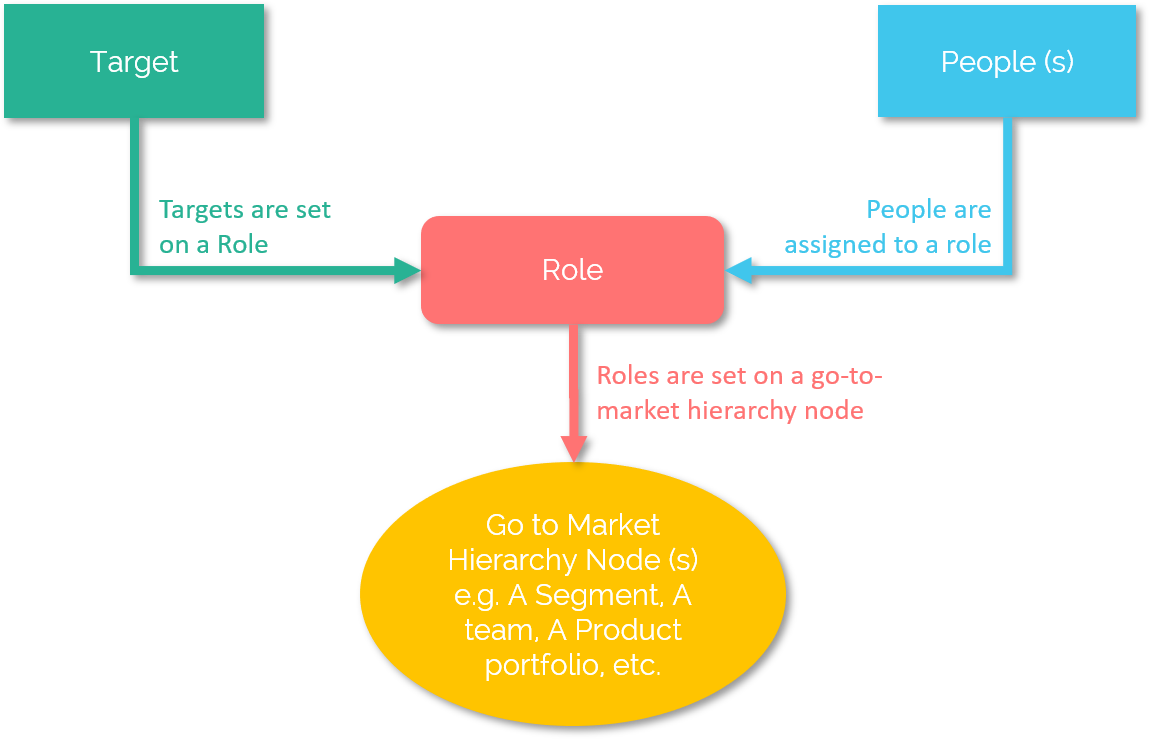
Figure 1. Role Designer
Clone plans
Roles are unique to each plan. If you clone an existing plan, the roles will also be available in the cloned plan so you do not have to re-create all of the roles for cloned plans.
Roles and assignments in Salesforce
For customers who use Salesforce, the process of creating Roles and Assignments works as follows:
Import roles your CRM or create them in Fullcast.
Import people (users) from Salesforce into Fullcast.
Assign people to the roles.
Export role assignments to the account team object in Salesforce.
Note
The Salesforce account team object only allows one person to hold any given role on a team, so if you have one person with multiple roles, the account team object will only reflect the most recent one.
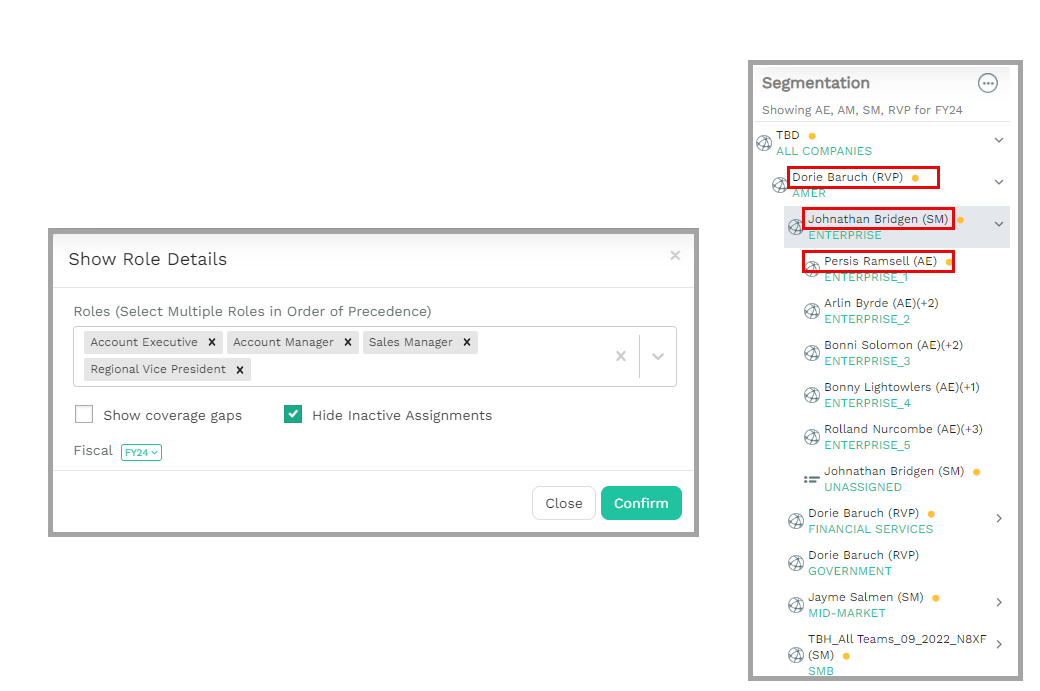
View role assignments
You can view roles in your territory plan. In the team designer, you can view roles within the context of your sales team’s hierarchy and group people across different dimensions.
Next Steps
After you create roles for a Plan, the next step is to create coverage assignments.