Temporary assignments are used when an employee is being assigned to a territory or team for a fixed, non-permanent period of time. For example, when you assign a rep to cover a territory while another rep is on leave.
Warning:
Before creating coverage assignments, you must define roles within your team. Refer to the Viewing and Managing Roles article for more information.
Create Territory Coverage
Access your Fullcast instance and switch plans if applicable.
Click Manage Coverage on the Territories tile.
Locate the relevant node (territory) and click Add.
Select the coverage type, normal for permanent assignments and temporary for non-permanent assignments.
Information:
Refer to the Creating TBx Assignments article for additional information regarding TBx placeholders.
Select the role of the user from the dropdown menu.
Information:
Having well-defined roles helps streamline the assignment process by ensuring members are assigned to roles that align with thier job functions. Also note that the role assigned determines their access and permissiosn to different app modules. Refer to Role Permissions for additional information.
Select the appropriate name from the dropdown menu.
Information:
The role assigned corresponds to their respective productivity profiles. Upon selecting the role, the productivity profile is automatically populated from the roles created in the roles module.
Input a start and end date.
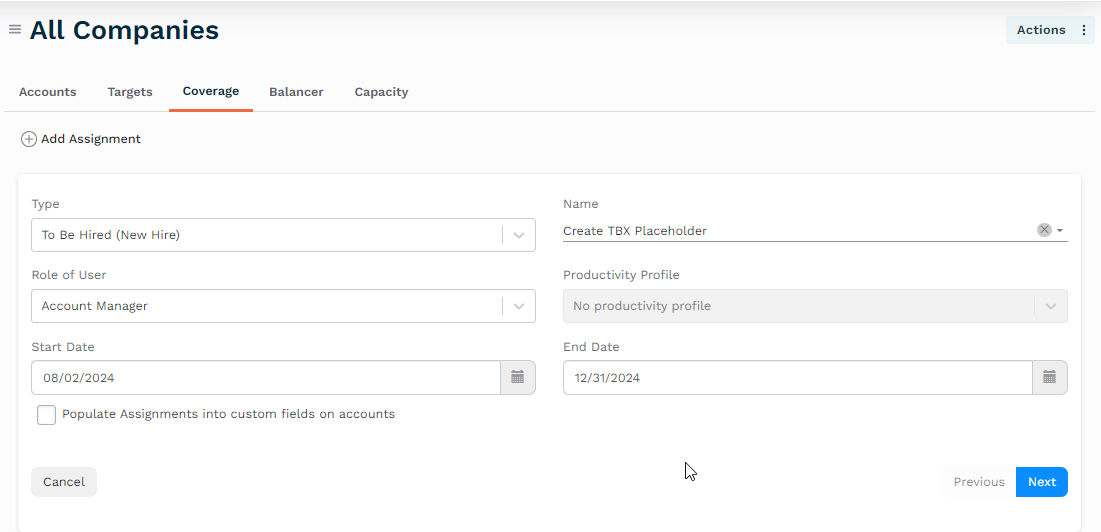
Figure 1. Coverage Settings
Information:
Start and end dates allow you to have a record of when a person was in a certain role in a given territory. Additionally, these dates become inputs for other aspects of your model such as productivity profiles and targets. While start dates can be adjusted to reflect past or future assignments, accuracy is essential as it directly impacts productivity calculations and subsequent target setting.
Click to enable the “Populate Assignments into custom fields on accounts” option if applicable.
Information:
Enabling the “Populate Assignments into custom fields on accounts” option is used for custom integrations and provides you with the ability to populate assignment IDs into custom fields, overwrite values already in a field, or populate only if the field value is empty or null.
Click Next.
Confirm your Productivity Assumptions and click Save.
Create Team Coverage
Access your Fullcast instance and switch plans if applicable.
Click Manage Team Coverage on the Teams tile.
Click Add.
Select the appropriate type of team member from the dropdown menu.
Select the appropriate role for the “Role of the User” option.
Information:
The Productivity Profile automatically populates based on your role selection. For more information regarding productivity profiles, see the Productivity Profile article.
Select the Start date and End date.
Enable the “Manager of Team All Teams” option if this coverage is meant to be the team manager.
Information:
There can only be one manager of a team.
Enable the “Populate Assignments into custom fields on people” option if applicable.
Note:
Enabling the “Populate Assignments into custom fields on accounts” option is used for custom integrations and provides you with the ability to populate assignment IDs into custom fields, overwrite values already in a field, or populate only if the field value is empty or null.
Click Next.
Confirm your Productivity Assumptions and click Save.
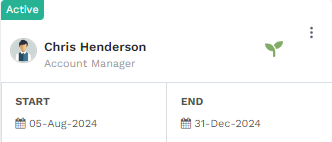
Figure 2. Team Coverage
The team coverage has been created.