This article discusses creating and editing entities, fields, and custom field values in Fullcast.
Notes:
Tenant Admin Permissions are required to complete this process.
A full import job needs to be run after adding any field to Fullcast.
Adding and deleting new custom fields and some editing features are only possible in Standard Jobs, not Custom Jobs.
At least one relation must be with Accounts, People, or Products.
Create a new entity
Access your Fullcast instance and switch plans if applicable.
Click the Settings icon (gear) in the navigation bar.
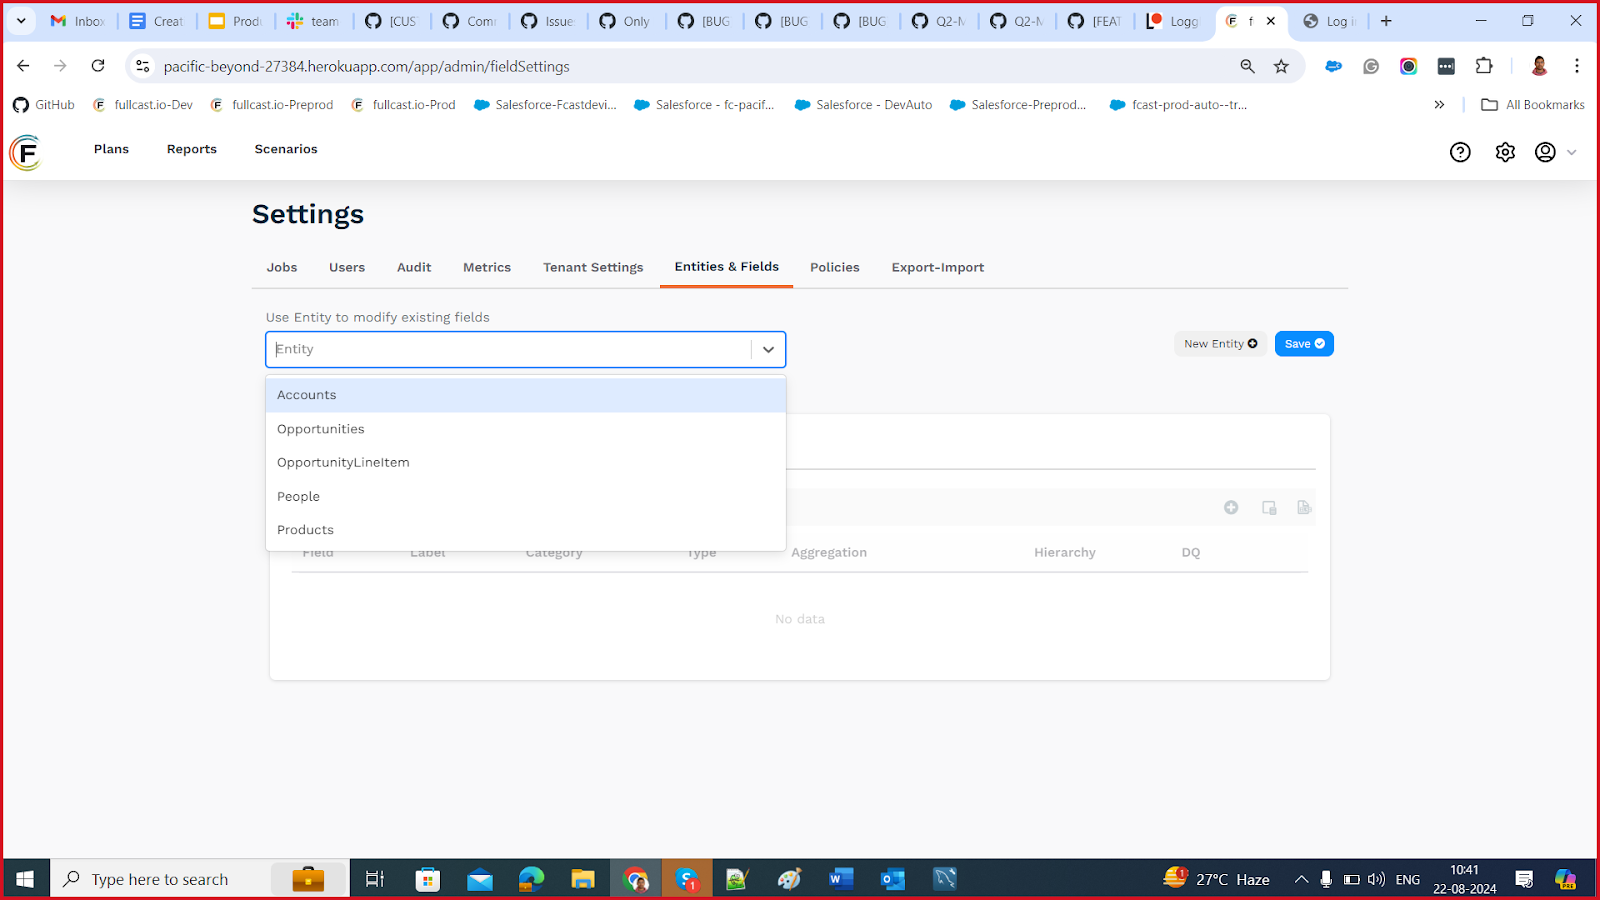
Click the Entities & Fields tab.
Select the applicable option from the “Use Entity to modify the existing fields” menu if applicable.
Click “New Entity”.
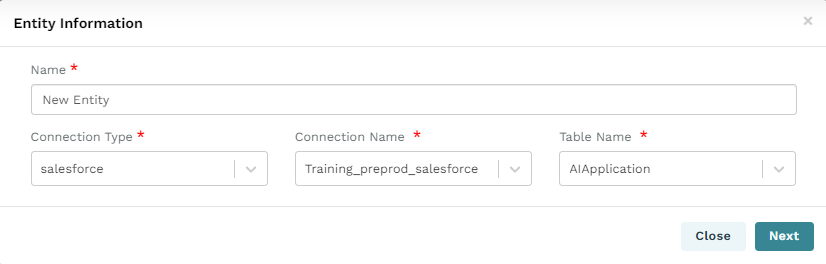
Provide a name and select the applicable “connection type”, ”connection name”, and “table name”.
Click Next.
Input CONFIRM (case sensitive) in the field provided and click Confirm.
Click Save.
Create a New Field
Access your Fullcast instance and switch plans if applicable.
Click the Settings icon (gear) in the navigation bar.
Click Entities & Fields.
Select the appropriate entity from the “Use Entity to modify existing fields” dropdown menu.
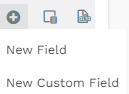
Click the Add New Field icon (plus sign) in the table header next to “Address Mapping” and select New Field.
Information:
For standard new fields, the Source Connection tab will automatically populate the “Type”, “Name”, “Table”, and “Data Type” fields based on the entity you selected. New custom fields require you to add this information.
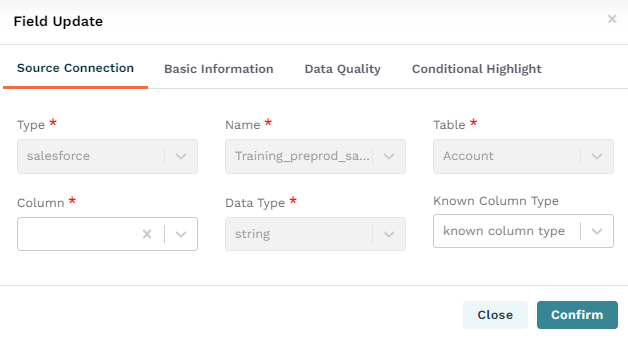
Select the appropriate options from the “Column” and “Known Column Type” menus.
Note
If you want to add a custom field, the field name has to be entered manually. The custom object column name will end with the object name “__c”. If you are adding a field from another object, the format should be ObjectName.Field API name.
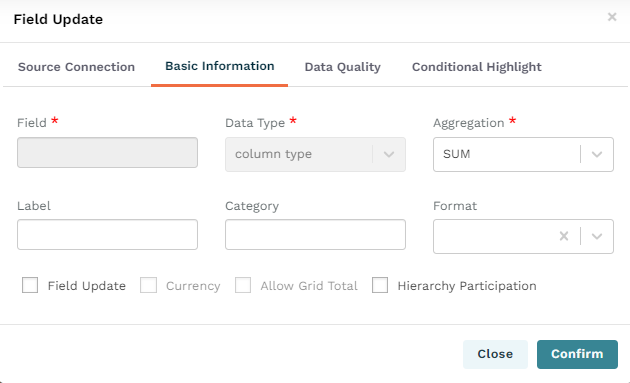
Click the Basic Information tab.
Note
The Field and Data Type fields will automatically populate based on the information you completed in Source Connection. Custom fields do not have these options.
Select the appropriate option from the Aggregation dropdown menu.
Input the appropriate information in the Label and Category fields.
Note
Label refers to the display name in the Fullcast UI.
Category refers to organization on the record details page, accessed through the plan data grid.
Select the format from the dropdown menu.
Enable each checkbox option as appropriate based on the information in the table below:
Option
Description
Field Update
Triggers auto rerun rules to run whenever this field is updated. (If auto rerun rules is enabled.)
Note
Once checked on any field, auto rerun rules will only execute when a designated field update field is modified.
Currency
Displays field values in the currency selected in your Salesforce organization’s Manage Currencies settings.
Note
Your Salesforce org must have multicurrency enabled.
Data types
Works only for field type of double or decimal.
If a field is already type = currency in Salesforce, this indicates to Fullcast that multicurrency is enabled, so the currency checkbox is not needed.
This feature works by adding a
convertCurrency()function to the import query. As such, the data import job will fail if Salesforce multicurrency is not enabled and if the Currency format is applied to a field type that is not decimal or double.
Notes:
The multicurrency feature must be enabled in Salesforce for the standard package to import all field values in the desired currency format.
Fields designated as “currency type” are automatically recognized as supporting multiple currencies by the Fullcast standard package.
For fields defined as decimal or double but intended to display as currency, update the Field Update > Basic Information details in the “Entities and Fields” category and apply the currency format.
If a field is neither decimal nor double, applying a currency format will not work and may cause the job to fail.
Allow Grid Total
Select this option to know the total value for that field.
Hierarchy Participation
Hierarchy create/edit fields are decided using this option.
Click the Data Quality tab.
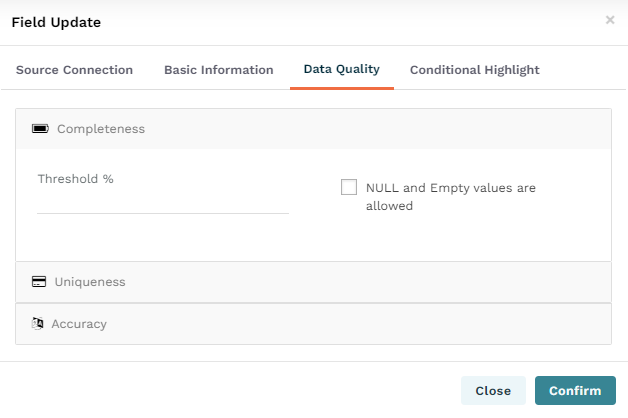
Complete the form based on the information in the table below:
Section
Options
Completeness
Input the threshold amount and enable the “NULL and Empty values are allowed” option if applicable.
Uniqueness
Input the threshold amount and enable the “Values must be unique” option if applicable.
Accuracy
Input the accuracy percentage and add conditions if applicable.
Click the Conditional Highlight tab.
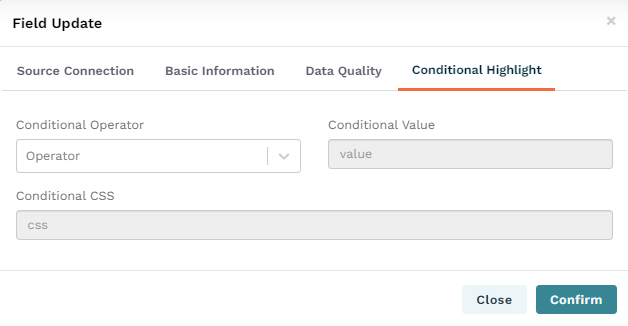
Select the appropriate option from the “Conditional Operator” dropdown menu and input values for the “Conditional Value” and “Conditional CSS” fields as appropriate.
Click Confirm.
Create a New Custom Field
A custom field in Fullcast is one that is available in and editable in the plan data grid. These fields can not be exported.
Access your Fullcast instance and switch plans if applicable.
Click the Settings icon (gear) in the navigation bar.
Click Entities & Fields.
Click the Add New Field icon (plus sign) in the table header and select New Custom Field.
Update the fields on the Basic Information tab.
Click the Data Quality tab.
Complete based on the information in the table below:
Section
Options
Completeness
Input the threshold amount and enable the “NULL and Empty values are allowed” if applicable.
Uniqueness
Input the threshold amount and enable the “Values must be unique” option if applicable.
Accuracy
Input the accuracy percentage and add conditions if applicable.
Click the Conditional Highlight tab and select the applicable operator from the conditional operator dropdown menu.
Click Confirm.
Address Mapping
For map processing, you can either select the billing address or shipping address from the Address Mapping tab. The default is the shipping address. All the fields related to the shipping address (“shipping country”, “shipping state”, “shipping city,” etc.,) will be included in the mandatory fields. Select whichever applies to you, click confirm, and save.
Multiple values are not allowed in the conditional value field. Please enter a single value.
The format for conditional CSS is "color": "red", "background-color": "blue"
Edit an Entity
Access your Fullcast instance and switch plans if applicable.
Click the Settings icon (gear) in the navigation bar.
Click the Entities & Fields tab.
Select the applicable entity from the “Use Entity to modify existing fields” menu.
Click the Edit icon (pencil and paper).
Update the conditions as appropriate and click Next.
Input CONFIRM (case sensitive) in the confirmation field and click Confirm.
Edit a Field
Access your Fullcast instance and switch plans if applicable.
Click the Settings icon (gear) in the navigation bar.
Click the Entities & Fields tab.
Select the appropriate entity from the “Use Entity to modify existing fields” menu.
Find the applicable field and click the Edit icon (pencil and paper).
Apply changes as appropriate and click Confirm.