Fullcast’s routing enables you to create discrete policies that function individually or create a routing queue (each policy is the logic for one specific routing queue).
Routing policy components
There are three main components on a routing policy: policy stages, policy tags, and policy operation times.
.png)
Policy stages: Determine how the records will be evaluated for routing. Policy stages can be toggled on or off and expanded to configure.
Policy operation tags (referred to as policy tags or tags): Determine which policy will be used to route a given record.
Policy operation times: Select the day of the week and a start and end time when the policy is active. If no operation times are specified, the policy will always be active once it is enabled.
Create a routing policy
Go to Policies > Manage Policies by Territory.
From the hierarchy menu, select the territory you want to create the policy for.
Click New Policy.
Under the Assignments section, find the type of routing policy you want to create and click Add Policy:
Routing policy type
Description
Account Routing
Assigns new accounts to sales representatives.
Case Routing
Directs customer issues to qualified support personnel.
Contact Routing
Assigns new contacts to customer success representatives.
Lead Routing
Distributes potential leads to sales teams.
Opportunity Routing
Assigns deals to sales representatives by territory.
Configure routing policy stages. Toggle on each stage you want to use for your routing policy.
Optional. Add policy tags.
Optional. Add policy operation times.
Click Save & Exit.
Routing policy stages
Fullcast routing policies offer several stages that can be toggled on or off based on specific requirements. Records progress through the stages sequentially. Toggling the stages on or off directly impacts the routing logic and process. Refer to each corresponding dropdown to configure routing policy stages:
Note
Not all stages are available for all routing types. Refer to routing policies overview to understand the overall process of implementing routing policies.
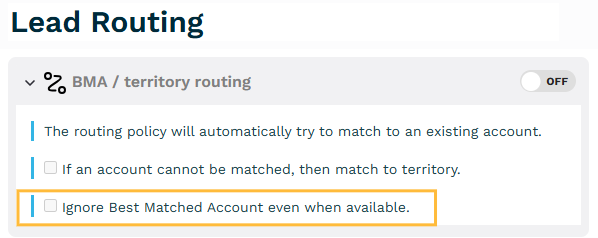
BMA / territory routing
This stage evaluates the record according to the same logic used in your territory structure. Optionally, you can enable BMA functionality to match records to existing accounts.
Note
This stage is for lead and account routing only.
BMA filters: Determine which existing account in your CRM is the best match for the lead or account.
Territory routing: Evaluates data fields on the record and processes them according to your territory rules to route them to a territory. For example, if you have a territory rule that uses an employee COUNT field on the account, you can evaluate an equivalent field on the lead.
Requirements:
This stage must be used with at least one other related stage (role-based routing or round robin routing).
BMA and territory routing require configuration in Salesforce Custom Metadata.
To construct detailed BMA logic, refer to:
Configuration options:
Complete the following fields:
Field | Description |
|---|---|
If an account cannot be matched, then match to territory | Select the checkbox to enable basic territory-based routing. Selected by default when you enable the stage and cannot be cleared. |
Ignore Best Matched Account even when available (lead routing only) | Select the checkbox to bypass best match if you want to route a lead to a territory different from the current territory of the associated account. For example, routing subsidiary leads to regional SDRs even when all subsidiaries in the same territory are designated as the ultimate parent in the territory rules.
|
Update Account Teams (account routing only) | Select the checkbox to update the account teams with all the exporting roles on the territory where the accounts are routed to.
|
Duplicate processing
This stage defines how the system identifies and handles duplicate records.
Note
If you already have duplicate processing setup in another system, such as marketing automation, this step may be redundant.
Requirements: Duplicate processing relies on Salesforce’s standard duplicate rules.
Configuration options:
There are slight variations in the configuration options according to record type. Complete the following fields:
Find Duplicates within the last [ | Type the number of days and the percentage match for the criteria to find duplicates. This works much like the match scores in Salesforce’s matching criteria. The percentage (%) match indicates how closely an incoming record matches an existing record. |
If a duplicate is found, then | Select one of the following to deal with the new lead based on the identified duplicate:
|
If a contact is found matching this lead, then (lead routing only) | Select one of the following to deal with the lead if contact is found matching:
|
If duplicates from the same domain are found, then | Create a different way to handle duplicates from the same domain (company). This could be useful, for example, in case routing where you would want to ensure that cases from the same domain, which could appear to be duplicates, get routed to the same owner.
|
Auto convert
This stage automates the conversion of leads to contacts. You can create one condition that enables conversion to happen based on either the lead or the associated account. If all options of this stage are enabled, the outcome would be a lead gets converted to a contact with the same information as the lead, and an account gets created and the contact would get associated with the account.
Note
Available for lead routing only.
Considerations: Auto-conversion can streamline lead management but requires careful setup to ensure accuracy and avoid premature conversions. If you do not have BMA well-tuned, you probably shouldn’t enable the auto-conversion of leads to accounts in this stage.
Requirements: The account-related aspects of this routing stage rely on the results of BMA processing.
Configuration options:
Complete the following fields:
Field | Description |
|---|---|
Auto convert lead to contact matching the following criteria on | Select one of the following:
Define a condition:
|
If no account exists, then | Uses the BMA outcome from the BMA / Territory Routing stage. Select one of the following:
|
Role-based routing
This stage routes records to either the account owner or individuals in specific teams roles, based on territory coverage assignments. Optionally, you can differentiate role-based routing according to account data.
Requirements: BMA / Territory Routing stage needs to be enabled for this stage to execute correctly.
Configuration options:
Leads, Cases, Contacts, Opportunities routing:
For If the lead is matched to an account, then route dropdown, select one of the following:
to account owner
based on the criteria: select a field and create different routing rules for different field values. Complete the following additional fields:
Field
Description
Pick a field
Select an account field.
Identified values in the field
Click add (+) to add field values and corresponding role. Complete the following fields:
Value: Type a value for the field.
Role: Select a role.
Accounts routing:
You can only select one role from the territory coverage assignments to route new records to.
Route the Account to the [
account] covering the territory dropdown, select an account.
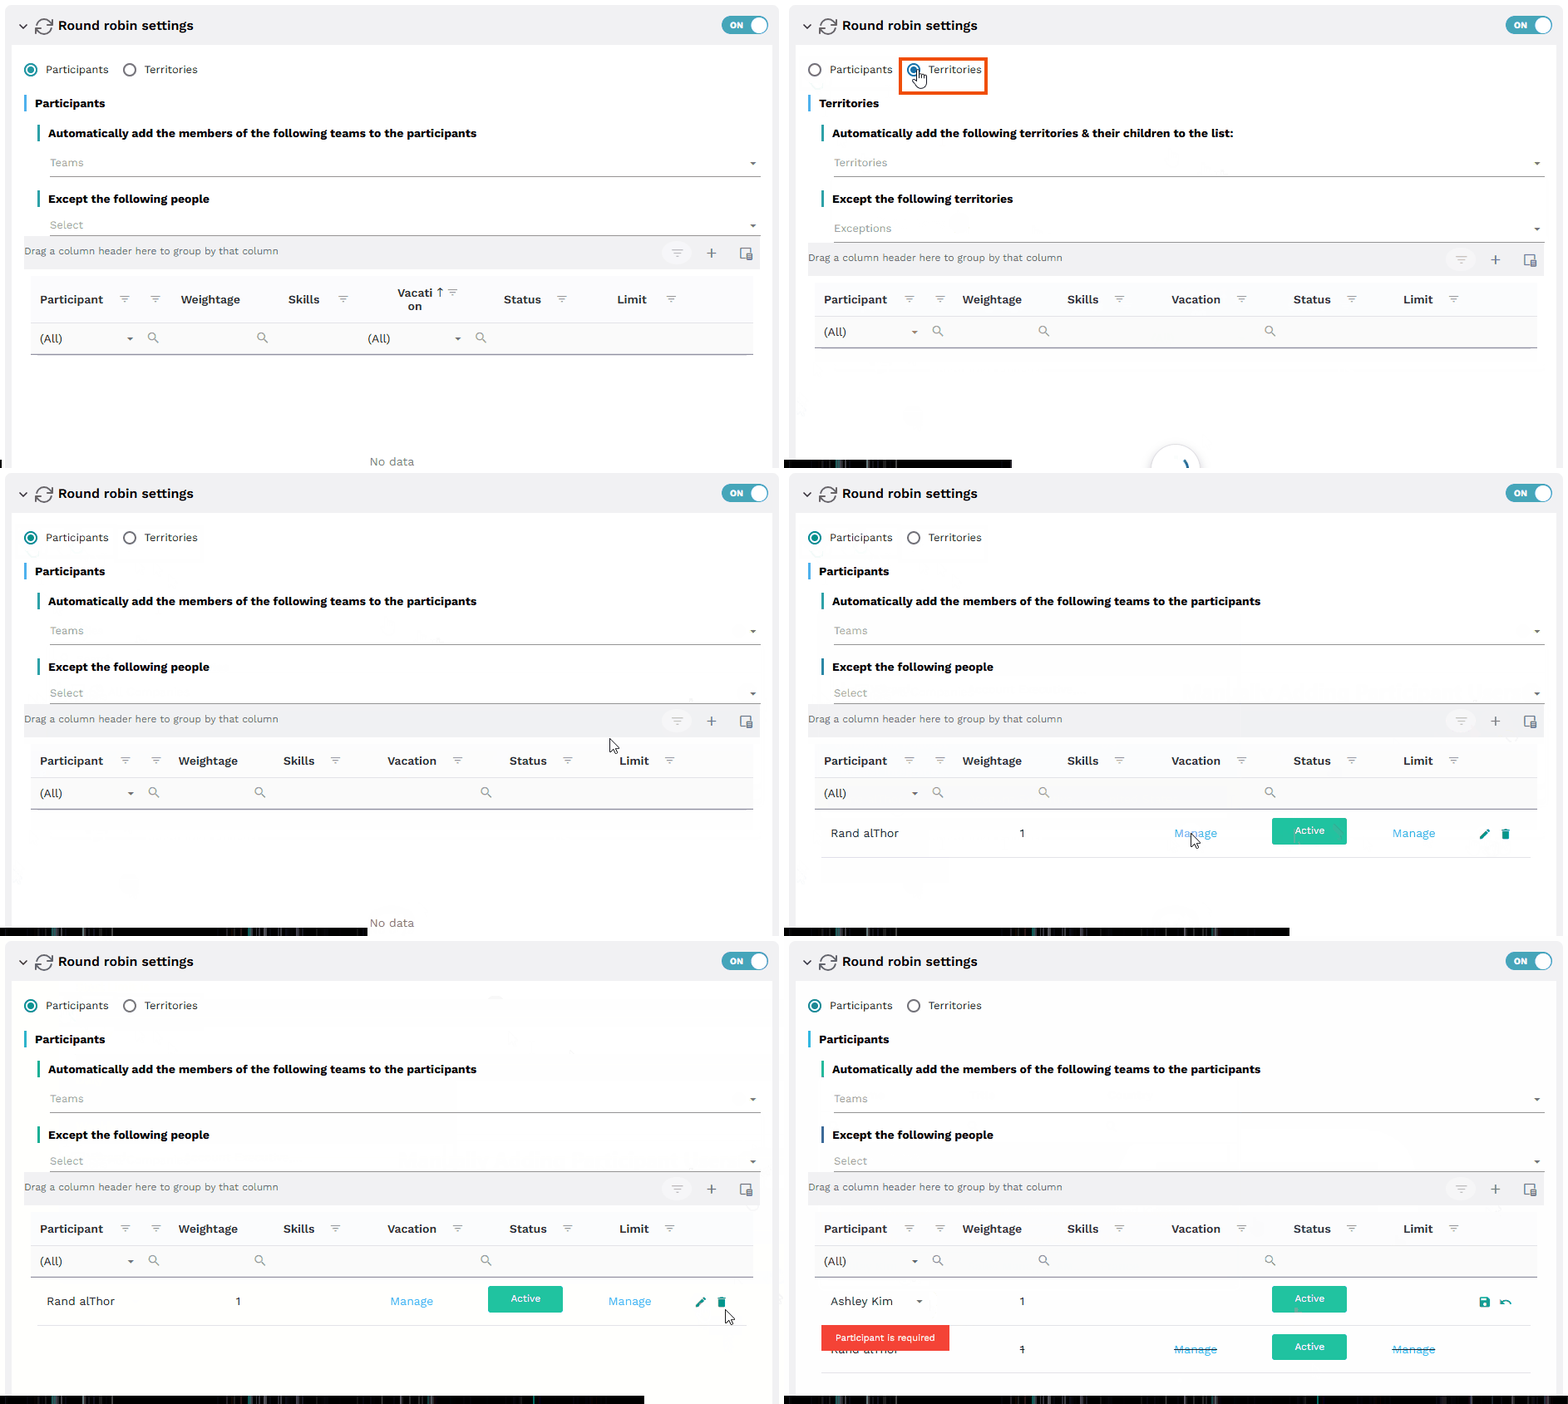
Round robin settings
This stage distributes records evenly among a group of participants (users) or territories.
Requirements: To round-robin between teams of participants, you must set up a team structure in the teams module. Otherwise, you need to manually add user names.
Configuration options:
Select one of the following:
Participants: Create the round-robin pools based on either team structure or manually add individual users.
Territories: Create the round-robin pools by selecting specific levels or nodes in a territory, or manually add territories.
Complete the following fields based on the first selection:
Field
Description
Automatically add…
the members of the following teams to the participants
(for Participants).
the following territories & their children to the list (for Territories)
Select one or more teams members or territories to exclude.
Except the following…
people (for Participants)
territories (for Territories)
Select one ore more team members or territories to include.
From the table, click add (+) to add a row. Complete the following columns in the table:
Participant: Select a team member or territory from the dropdown.
Weightage: Type a number which works like a ratio. Each member of the round-robin pool gets a number, which impacts the volume of records they will receive relative to the other members of the pool.
Skills: Type a number that refers to specific values configured in the Policy Handler and allows users to receive preference over another user if they have a skill that is needed for a specific record.
Vacation: Used to pause routing to a team member or territory. After you click Save to add the participant, click Manage to add vacation dates and type the start and end dates of the leave.
Status: Click to disable the team member or territory.
Limits: Specify a maximum number of records in a given timeframe.
Additional Configuration: Select the checkbox for one or more of the following options as needed:
Skip to next stage if no skills match: Skips the stage if no matching skills are found
Support Agent Login for Round Robin routing: Support agent login for round robin routing.
Limit total number of Account routed to anyone to a maximum of: Limits the total number of cases.
For more detailed information, refer to Understand Fullcast Round-Robin Functionality.

Default user & record tagging
This stage allows you to specify what to do if the previous stages fail to route the record. It serves as a fallback. It also allows you to set up rules for automatically tagging routed records.
Configuration options:
Complete the following fields:
Field | Description |
|---|---|
If all else fails, route to a default | Select a one of the following:
|
Update the following fields on the Account | Optional. Select multiple fields to stamp on the record at the time of routing. This can be helpful for tracking purposes. The values that are available include things such as Territory Name. |
Don’t update the Owner Field | Optional. Select the checkbox if you do not want the owner updated. |
Update Account Team Roles | Optional. Select the checkbox if you want the account team roles updated.
|
Notifications via Chatter
Notify users when a record is routed. When toggled on, this will send a default notification message to the new owner of the record.
Configuration options:
Complete the following fields:
Additional Text to Send in Notifications: Type a fixed text string to include in the Chatter Notification
Additional People beside the owner to notify: Select additional users to include in the notification
.png)

.png)