From within your Fullcast instance, you can control which information to import and export, track this process, and troubleshoot data movement issues. You can find all of this in the Export/Import tab. If something goes wrong, you can look at error messages to see what happened.
Note
This article provides information on the processes around a standard import job with a Fullcast instance running a standard job package. The standard package includes comprehensive CRUD capabilities for both fields and entities. Users with version 2.160 and above are eligible to access the standard package and manage data within the system. Refer to the Export/Import Data Between Fullcast and SFDC Environment article for more information.
Before you begin
Data imported
The Standard Import Jobs brings in data for the following entities from Salesforce to Fullcast design application:
Accounts
People
Product
Opportunity
Opportunity Line item
These entities feed into different modules of the Fullcast application. Within Plans, you can leverage data from the Account, People, and Product entities. Within Scenarios and Reports, you can leverage data from your Plans and their related entities, as well as from the Opportunity and Opportunity Line Item details.
Run the first import
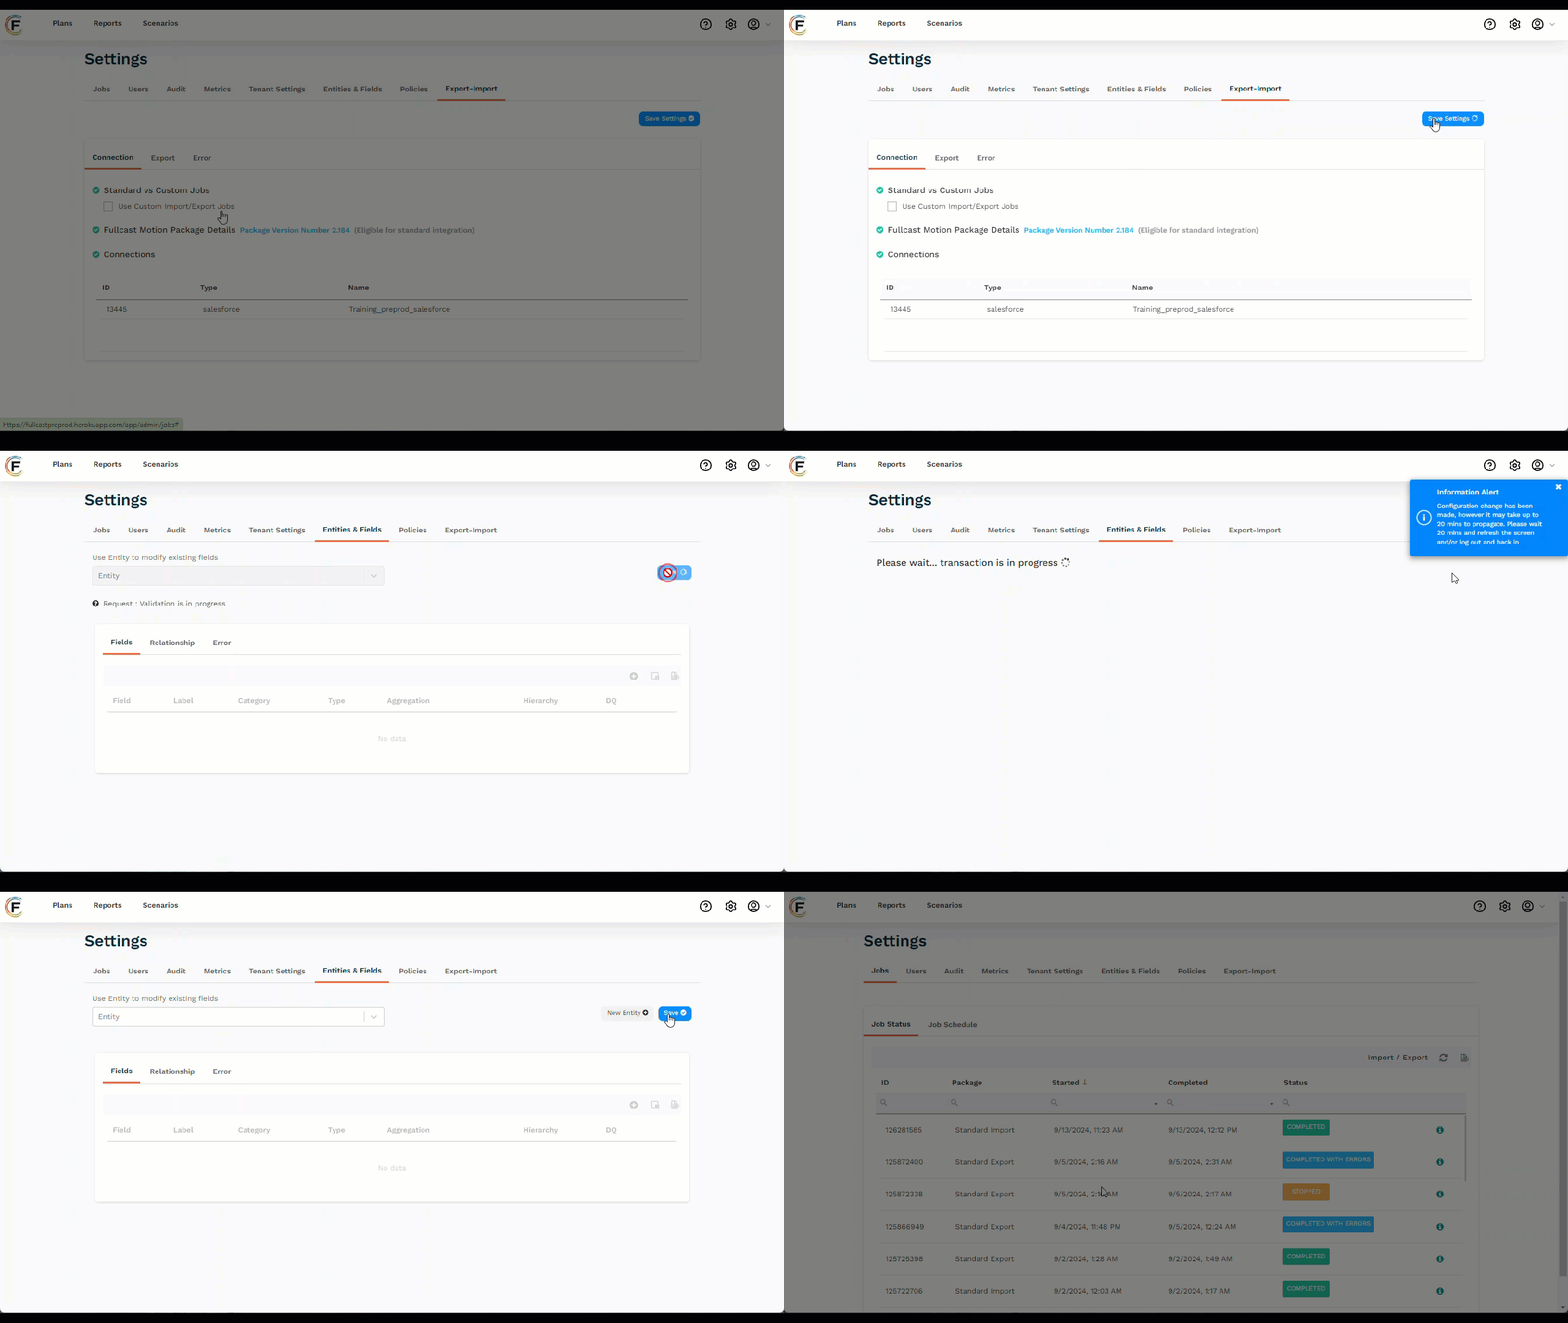
During the initial provisioning of Fullcast, you must run an import to get data from your Salesforce instance. Once you have completed the authentication, you can run the first import.

Go to Settings > Export-Import.
In the Connection tab, unselect Use Custom Import/Export Jobs.
Click Save Settings.
Go to Entities & Fields tab.
Click Save and wait for the transaction to complete.
Note
This configures the system to use a standard import. It may take up to 20 minutes for the standard import job option to become available in the jobs picklist. Once it appears, you can perform the standard import.
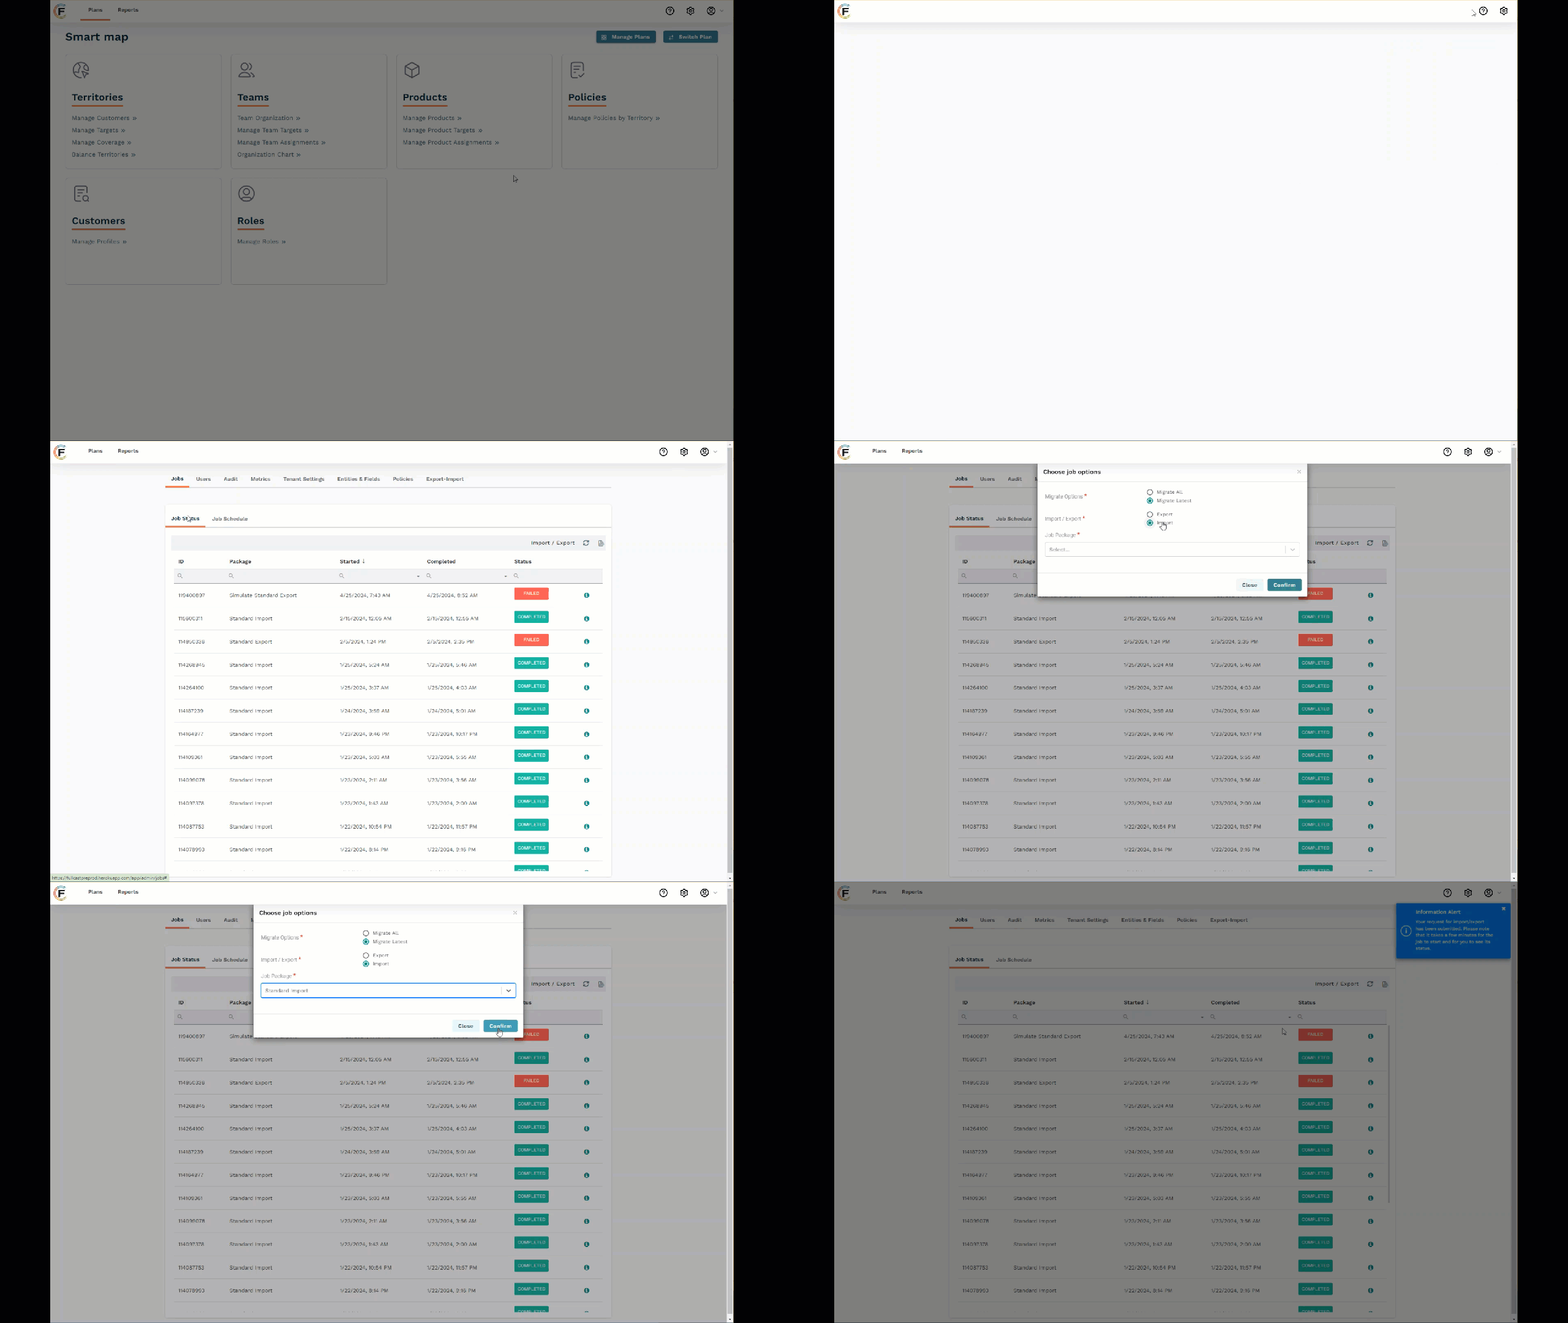
Run an ad hoc standard import job

Use the following step to complete a standard import job.
Go to Settings > Jobs.
Click Import/Export.
Complete the following fields to configure the job:
Field
Description
Migrate Options
Select one of the following:
Migrate All—migrates all the records.
Migrate Latest—migrates only records that have changed since the last import.
Note
In a Migrate Latest job, Fullcast imports records if their
LastModifiedDateis more recent than the start date of the last successful import.
Import / Export
Select Import.
Job Package
From the dropdown select the standard import job package.
Click Confirm.
Note
After an import, record changes are determined by settings like automatic rerun rules, which can result in actions like moving new accounts or leaving them in unassigned. You may also see other changes, such as metrics updating to reflect new data.
Apply filters to standard import job
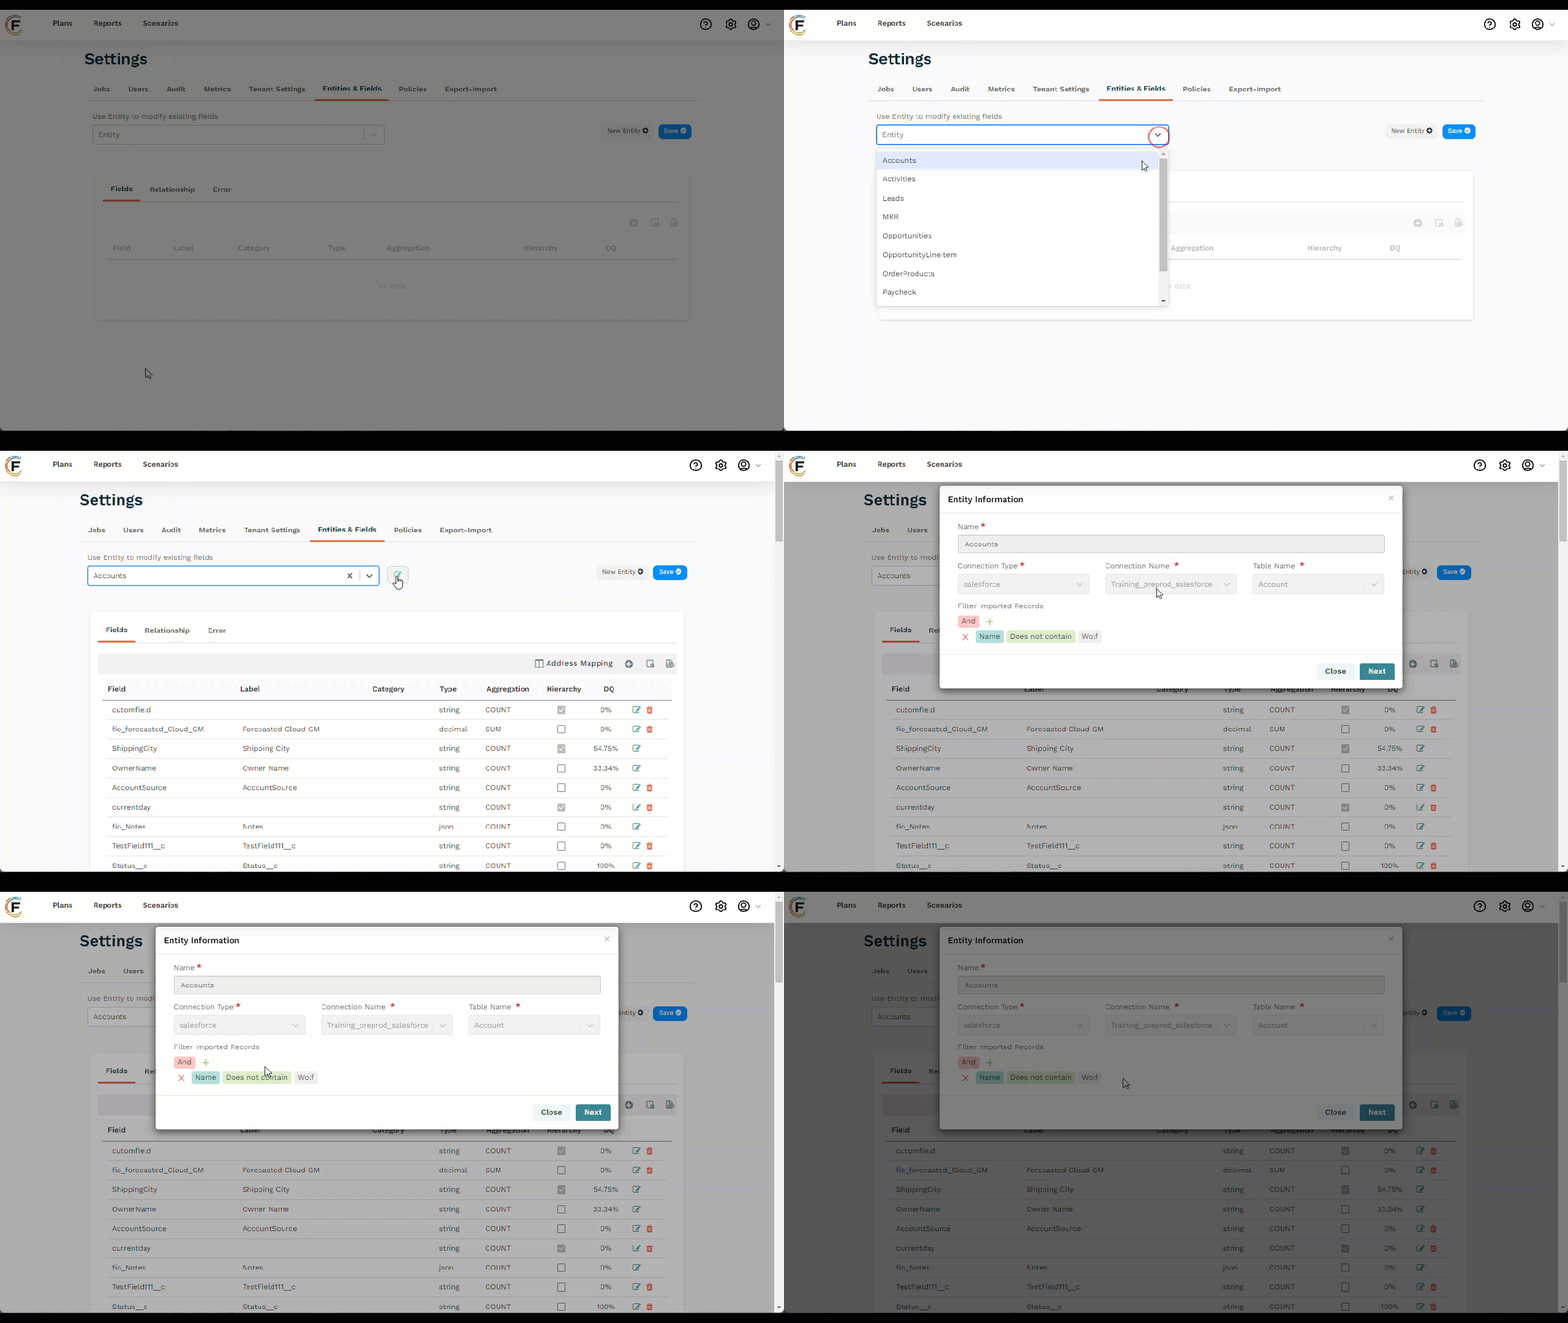
Users can apply filters to an entity to run a standard import job for a specific entity or even a filtered set of records on an entity.

Go to Settings > Entities & Fields.
Select an entity from the dropdown menu.
Note
The table will populate with information based on the entity you select and an Edit option appears next to the dropdown.
Next to the entity dropdown, click Edit.
Under the Filter Import Records section, add operators and conditions to set the criteria that defines what data is imported.
For example, if your GTM design designates separate plans for prospects and partners, you may choose to exclude partner accounts from the data imported into your sales plan.
Note
Only records that match the criteria will be imported.
If you modify the filter criteria, it replaces existing matching records with those that meet the new conditions.
If you delete all criteria, it will trigger a full import.
Partial imports only update existing records and fields.