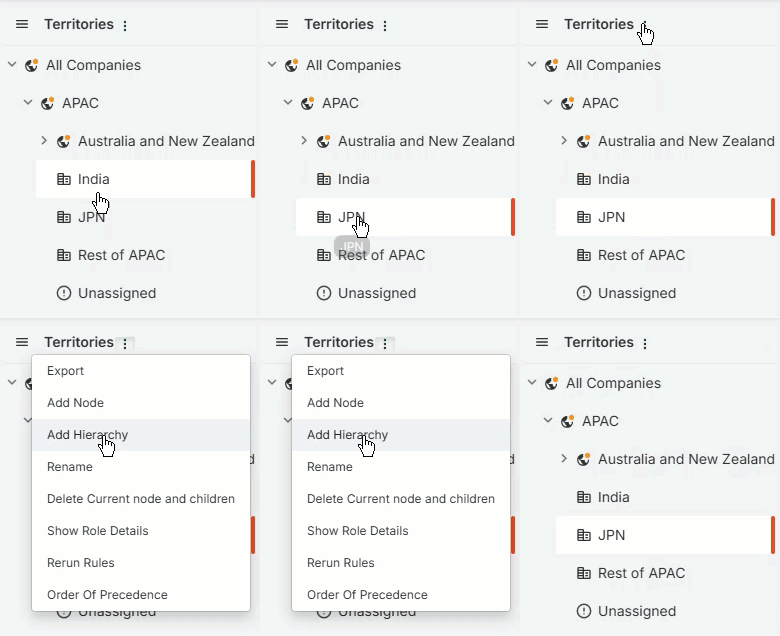
Use smart plan to automate territory balancing based on selected criteria when you create a hierarchy from a node.
Create a Smart Plan
Go to Territories > Manage Accounts.
From the left node menu, select the territory you want to create the smart plan from.
Click More Options > Add Hierarchy.
From the Add Hierarchy menu, select Smart Plan.
.png)
Complete each section:
Basic Configuration
Complete the following:
Field
Description
Number of territories to build
Type the number of territories you want to create and balance.
Max number of accounts per territory
Optional. Type the maximum number of accounts distributed to each territory.
Balancing Criteria
Add and prioritize criteria that determines how accounts are balanced between the territories.
Click Add Criteria.
Select one of the following criteria options and configure the criteria:
Add more criteria as needed.
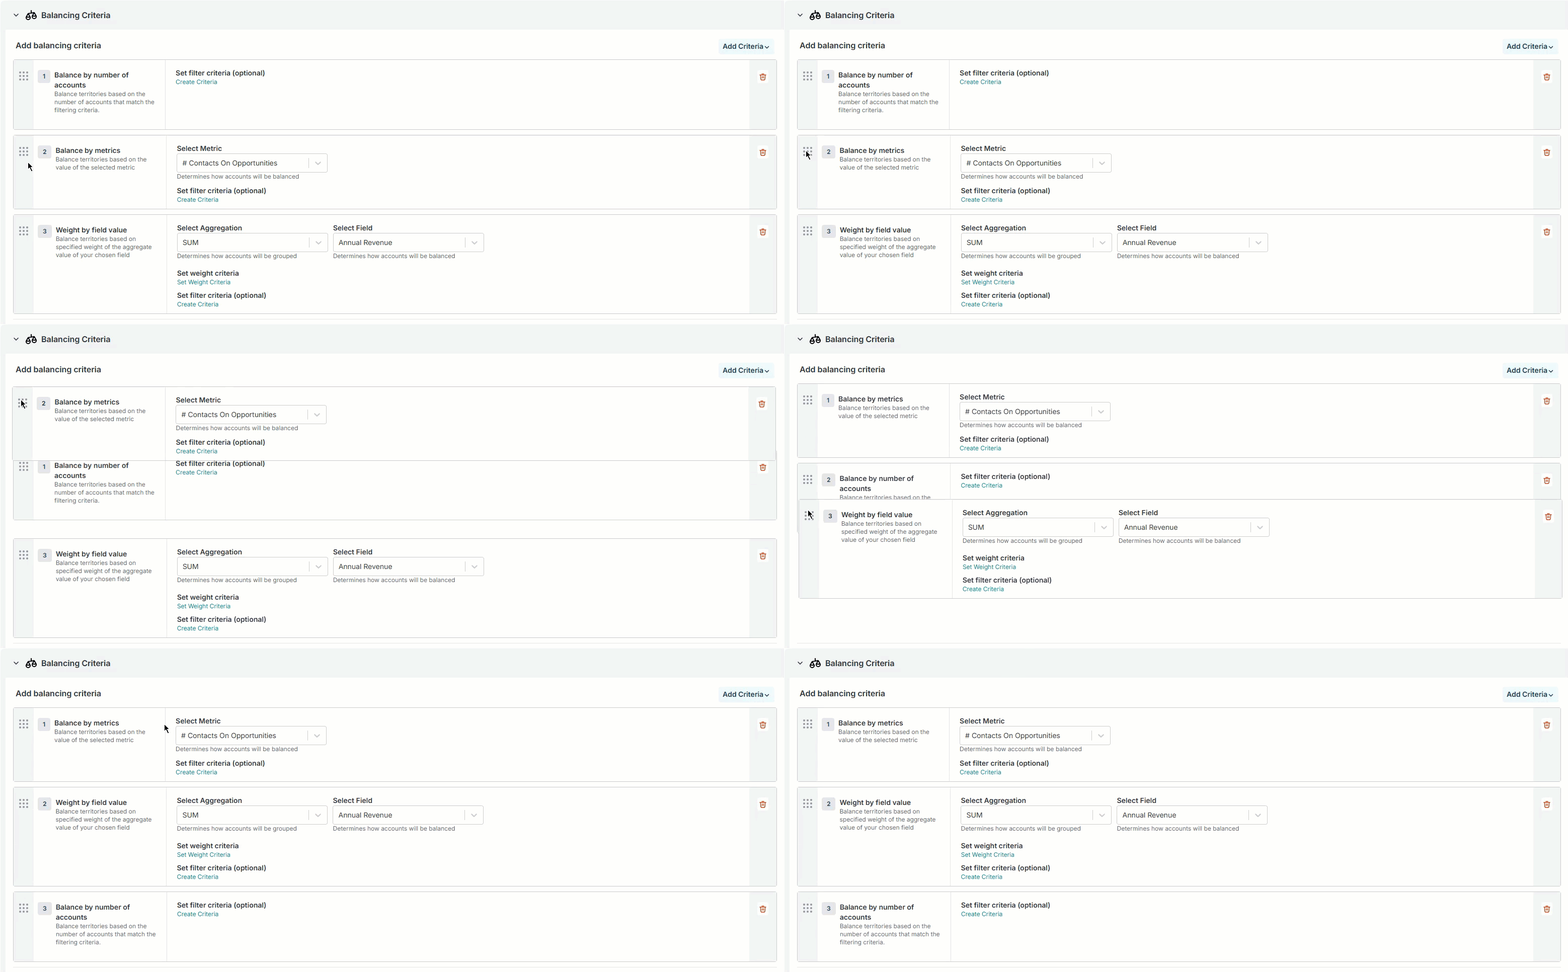
Optional. If you have more than one criteria, click and drag the criteria in the order you want them prioritized.
For How do you want to treat unassigned accounts?, select one of the following options for records that do not match the criteria:
Option
Description
Leave them in unassigned node
Unassigned accounts remain in the unassigned node and do not change.
Distribute them among the territories
Distributes unassigned accounts equally between the created territories.
Account Families
For How do you want to treat account families in this segment? section, select one of the following:
Option
Description
Do not reassign child accounts to the same segment
Children accounts remain in the segment they were originally designated.
Assign all child accounts to the same segment
All children accounts will reside in the same territory as the parent.
Assign child accounts that match the following criteria to the same segment as the parent
Only child accounts that match the specific criteria will move to the same territory as the parent.
Group all accounts belonging to the same corporate family into one segment
Identifies the ultimate parent that has the largest number of matching records. All other records that meet the criteria are moved to the same territory as that ultimate parent.
For Factor child accounts in territory balancing? section, select one of the following:
Option
Description
Yes, factor child accounts in the overall territory balance
Includes all children accounts when territories are balanced.
No, do not factor child accounts in the overall territory balance
Excludes children account when territories are balanced.
Named Accounts & Exceptions
For Factor Named Accounts into the territory balance?, select one of the following:
Field
Description
Yes, factor Named Accounts in the overall territory balance
Includes named accounts when territories are balanced.
No, do not factor Named Accounts in the overall territory balance
Excludes named accounts when territories are balanced.
Assignments
Complete the following to assign employees to the new territories:
Note
The number of persons selected must be equal to or less than the number of created territories.
If you add minimize disruption criteria, you cannot select a role different from the role selected in the criteria because the assignment aligns accounts based on a specific field listed on the account record and matches it with the person assigned. If assignments are omitted, criteria is disregarded during territory creation, and all accounts are left unassigned due to the absence of criteria for matching account records with person records.
Productivity profiles are automatically populated when you select a role.
From the Employees dropdown, select all of the employees you want to assign to a territory.
From the Type dropdown, select the type of assignment:
From the Role dropdown, select the employees role for the assignment.
If the role has a ramp profile, from the Ramp Profile dropdown, select a ramp profile for the assignment.
In the Start Date field, click the date picker and select the start date for the assignment.
In the End Date field, click the date picker and select the end date for the assignment.
At the top, click Save & Exit.

