Scenario Planner helps revenue organizations design and track different go-to-market (GTM) strategies and capacity models. A key function is modeling how to best use available capacity to maximize returns.
Access your Fullcast instance and switch plans if applicable.
Click Scenarios in the menu bar.
Click New Scenario on the Scenario landing page.
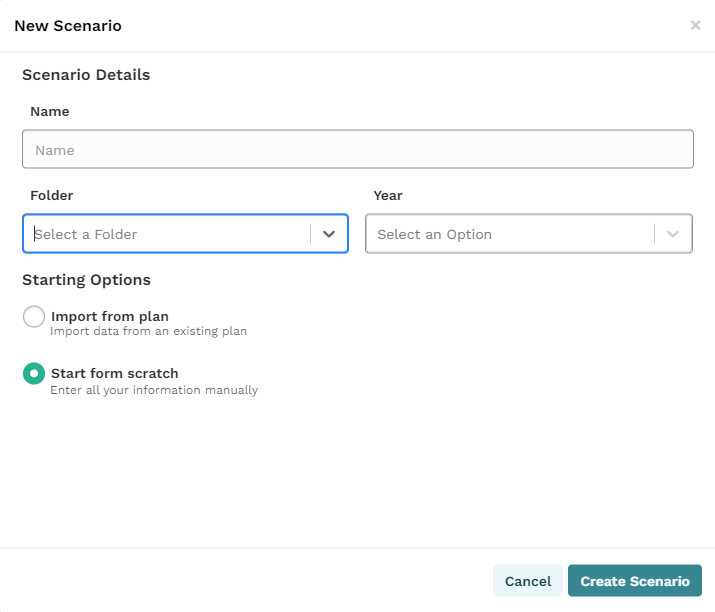
Provide a name, folder, and fiscal year for your scenario.
Click Start from Scratch to add your information. Alternatively, click Import from Plan to import data from an existing scenario.

Figure 1. Scenario Details
Click Create Scenario.
Click Add on the Revenue and Expenses page and select the applicable option.
Category | Sub-Category |
|---|---|
Revenue |
|
Cost of Goods Sold (COGS) |
|
Operating Expenses |
|
Other | Other |
Provide a name and click Continue.
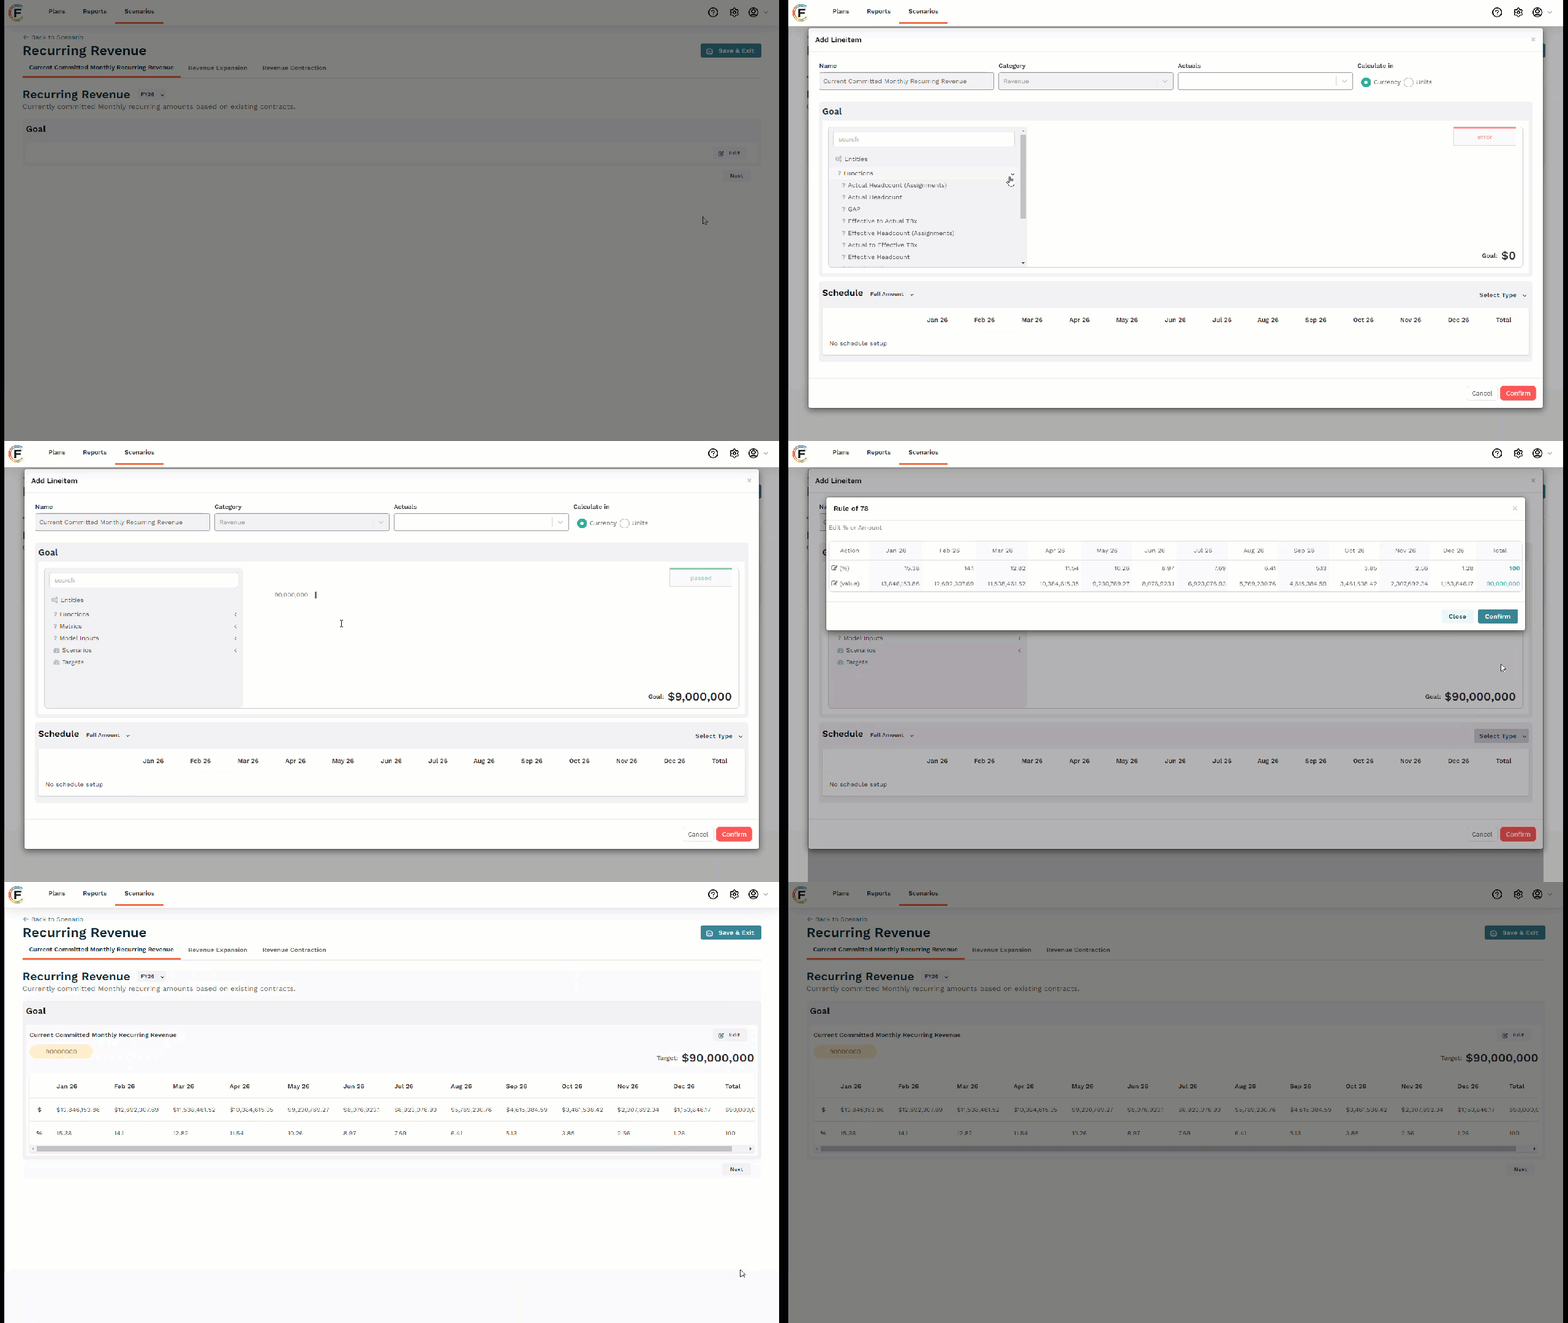
Click Edit in the Goals section and configure your Entities, Functions, etc. as appropriate. Alternatively, enter your goal amounts in the space provided.
Select a schedule type.
Warning:
A schedule must be provided.
Review the schedule and click Confirm.
Click Confirm.

Figure 2. Reviewing Schedule
Click Next to add additional information based on your selection from step 7.
Category | Sub-Category |
|---|---|
Recurring Revenue |
|
Non-Recurring Revenue |
|
Headcount |
|
Production Cost |
|
Headcount (Operating Expenses) |
|
Marketing Expenses |
|
Sales Expenses |
|
Other Expenses |
|
Other | Identify a type and click continue. |
Click Save and Exit.
Click the Models tab.
Click Add Model.
Select the applicable model from the dropdown menu.
Provide the model with a name and click Confirm.
Click Edit to add inputs as applicable, and click Save and Exit.
Repeat these steps for additional models as necessary.