Access your Fullcast instance and switch plans if applicable.
Click Manage Targets on the Territories tile.
Find the applicable node and Find the appropriate target.
Click the More Options icon (three vertical dots) and select View Details/Edit option from the dropdown menu.
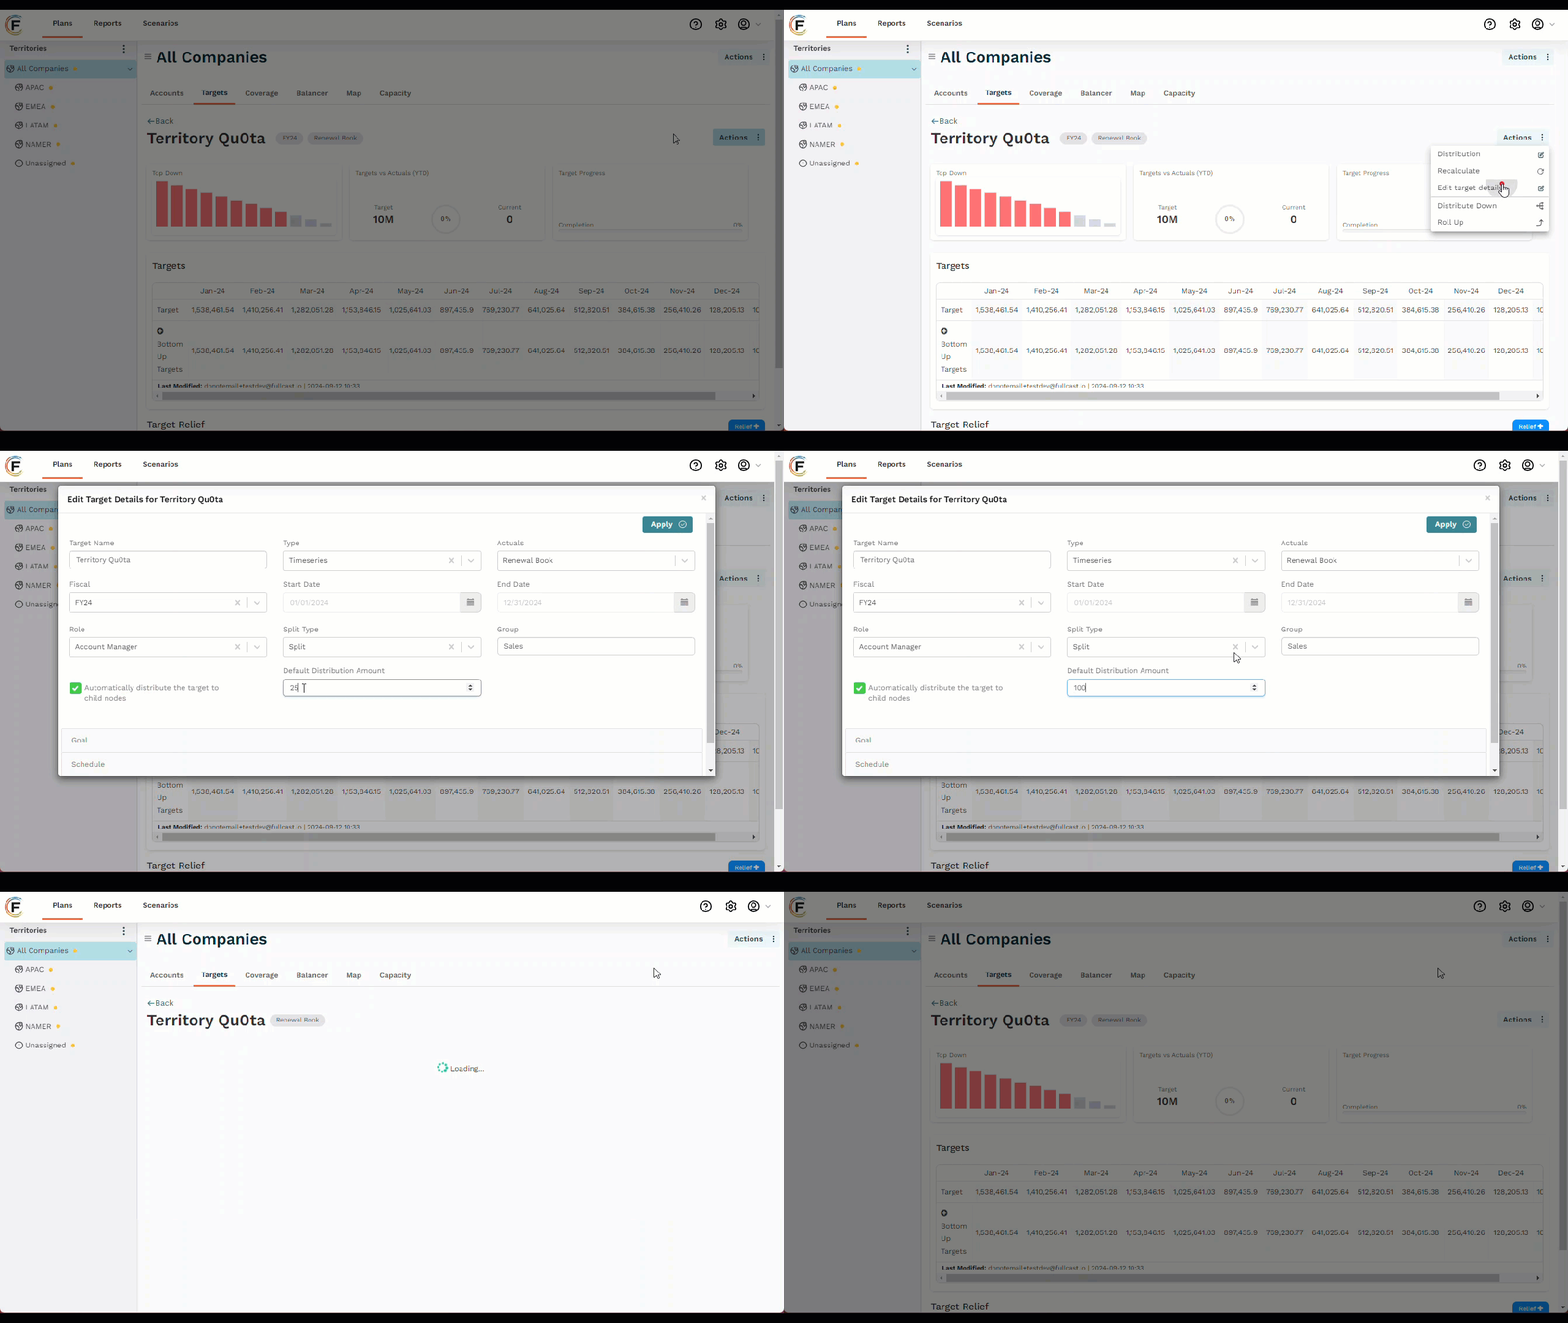
On the Target landing page, click the Actions button and select Edit target details.
Check the box “Automatically distribute the target to child nodes.”
Input a value in the Default Distribution Amount field.
Click Apply.

Figure 1. Set Default Target Value
Check the changes in the target after setting the default target:
Go to the parent node in the hierarchy.
Pick View Details from the drop-down after selecting the three vertical dots on the right-most corner of the target.
On the Tops Down vs. Bottoms Up tab, Select the + button to view the bottom-up changes.
