Two types of goals can be set for targets: dynamic and static. Static goals are fixed, unchanging targets or benchmarks that guide revenue-generating activities. When setting up a target, it is necessary to set an annual goal. Dynamic goals are targets that can change and adapt based on real-time data and performance metrics.
Access your Fullcast instance and switch plans if applicable.
Click Manage Targets on the Territories tile.
Click the Add button.

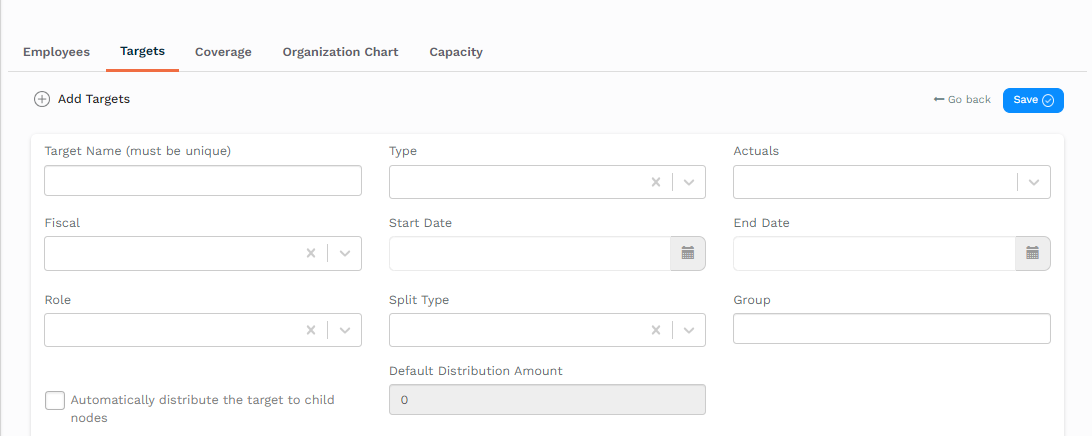
Figure 1. Add Target Settings
Complete the Add Targets section based on the information provided in the table below
Option
Action/Description
Target Name
A unique identifier for the target.
Type
Select timeseries. This is where the target is typically broken down into a month-by-month schedule.
Actuals
This metric measures the actual progress of the target. Every target must have a metric.
Fiscal
The fiscal year that the target is for.
Start Date
The date this target started.
End Date
The date this target is set to end.
Role
No target can be created without having a person in a role responsible and accountable for it. All targets must be assigned to a specific role, and when a person is assigned to that role – they would inherit the target.
Split Type
Identifies whether people in the same role split the target or get the whole target.
Group
A label is used to group targets for easy representation. This has no impact on functionality. E.g. In a compensation plan, targets are usually measured under various categories. It is better to use hashtags (#) to name groups.
Click Goal to expand the goal options and enter the goal amount in the formula edit box.
Set your goal based on the information provided in the table below
Goal Type
Directions
Static
Input a value and formula as applicable.
Proceed to step 7.
Dynamic
Drag the sales metric from the list of available formula elements.
Select a node in the hierarchy.
Select a fiscal year to use.
Enter *1.3 after the variable (this increases the sales quota by 30%).
Confirm the value and final goal.
Proceed to step 7.
Click Distribution and select a distribution method from the dropdown menu.
Click the Save button.
