This article provides information on configuring tenant settings within Fullcast. This article covers license management, people search and clone options, fiscal year configuration, details panel fields, grid display preferences, and account family visibility.
Access your Fullcast instance and switch plans if applicable.
Click the Settings icon (gear) in the navigation bar.
Click the Tenant Settings tab.
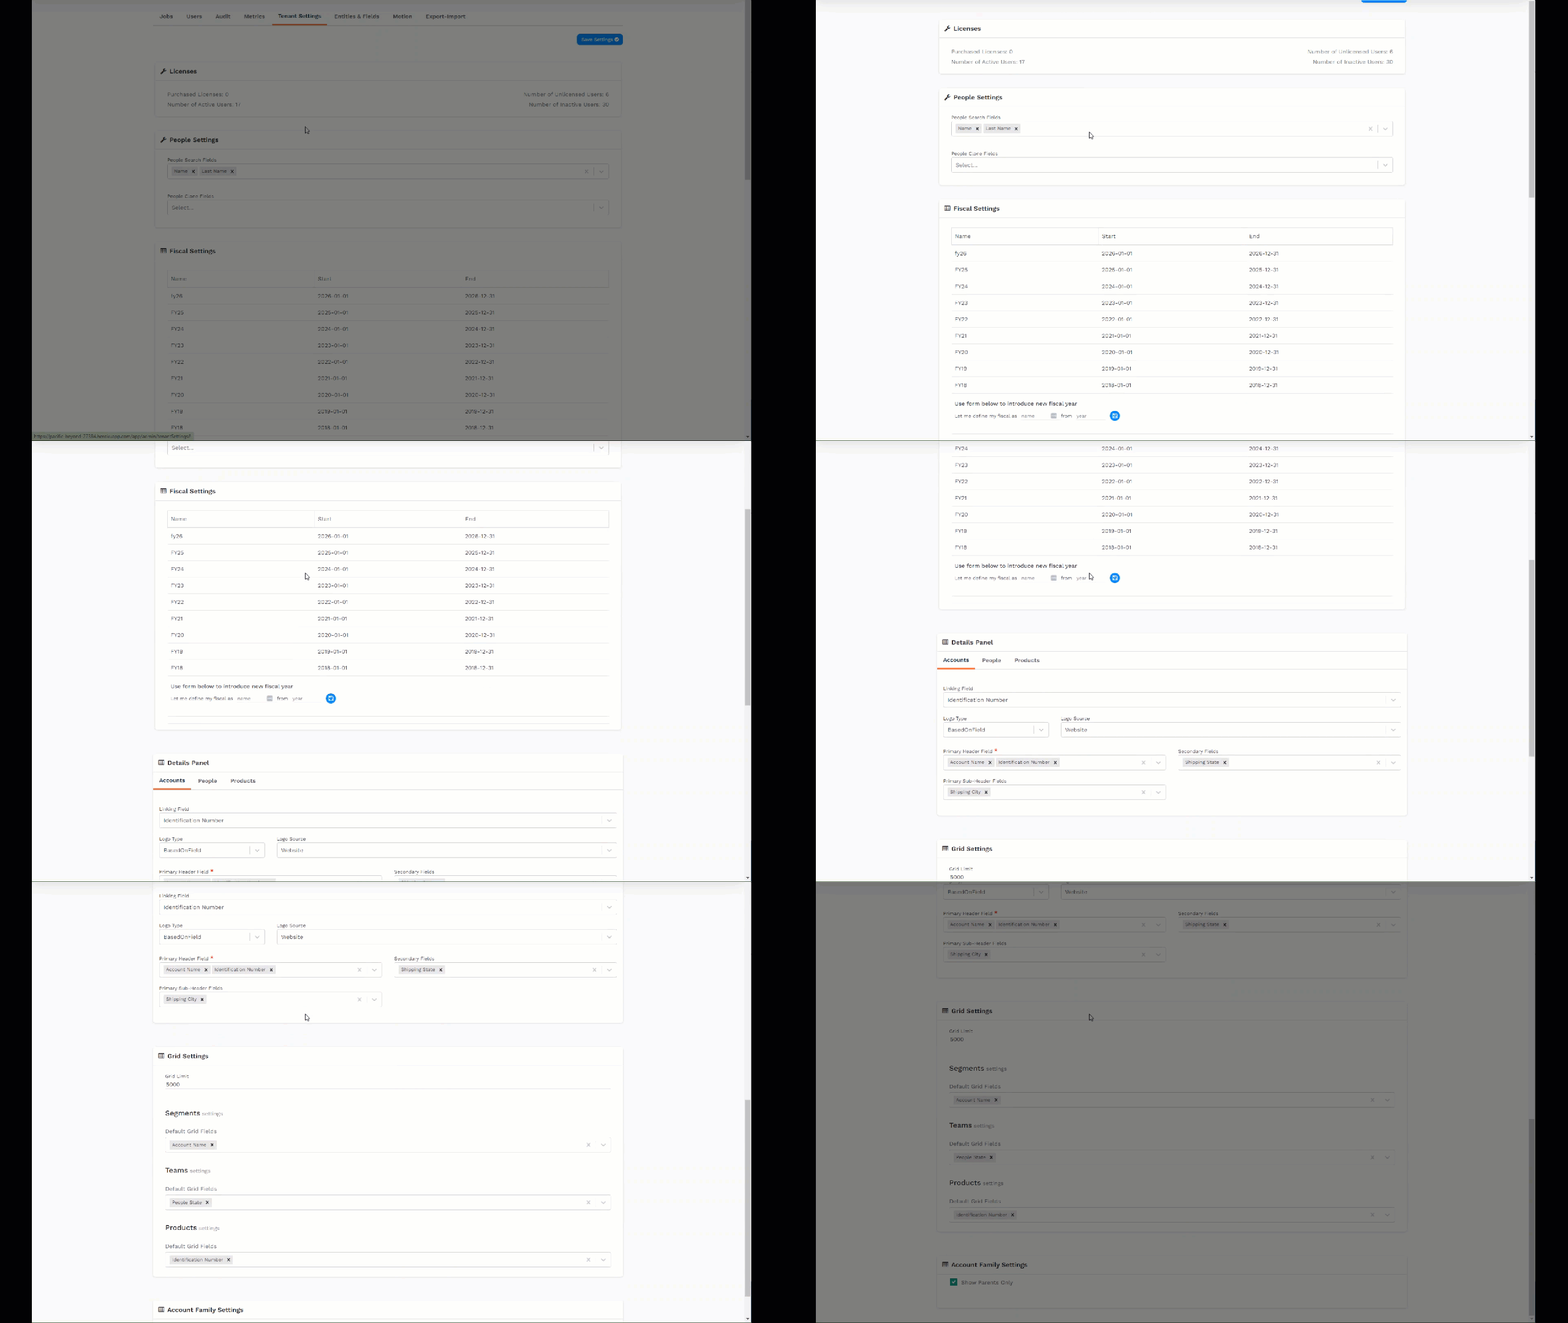
Tenant Settings
Licenses

License Settings
You can view details about License usage.
People Settings

People Settings
People Search Fields: Search fields are related to creating coverage assignments. When you create a new role-based assignment - in the Coverage tab of a territory or team plan - you will be able to search for the user. The people search fields selected in tenant settings allow you to configure how you can search for users when creating assignments.
People Clone Fields: Clone fields are related to TBx placeholder assignments. Choose clone fields that will streamline your creation of TBx placeholders. Some helpful selections are:
Manager Name
Country
User Role Name
Title
Fiscal Settings
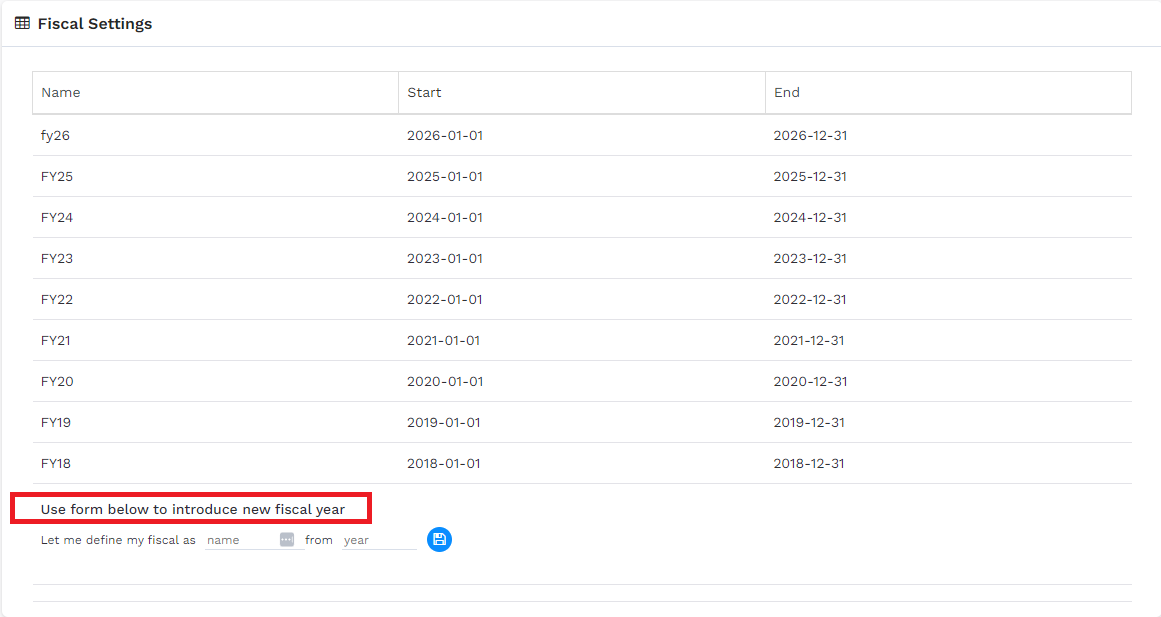
By using the form in this section, you can name your fiscal years and set the start and end dates.
Enter the name of the Fiscal Year. For Example: FY21.
Use the format yyyy-mm-dd for start and end dates.
Information:
Currently, the Fullcast app allows a maxium of three fiscal year settings.
Details Panel
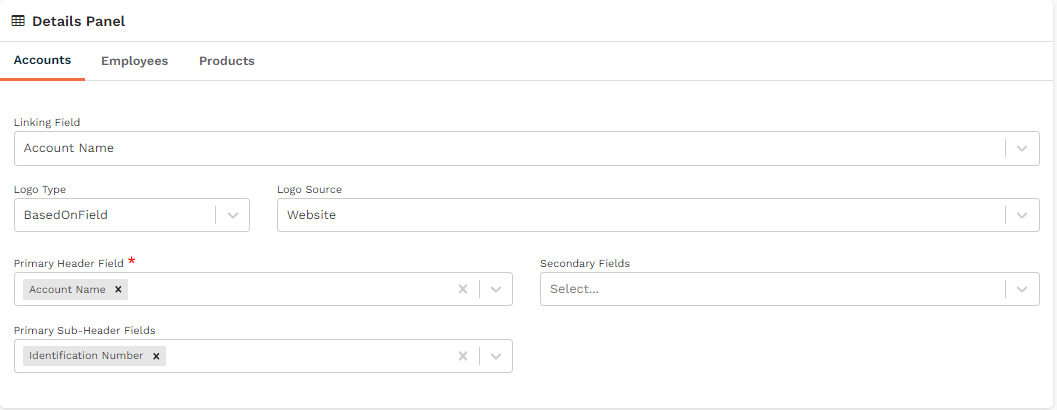
Details Panel Settings - note the three tabs for Accounts, Employees, and Products.
The details panel is the view that appears when you click on an item in the Grid view. The details panel settings control which fields will appear in the view, as well as which field will be clickable. Note that there are separate tabs for Accounts, Employees (People), and Products.
Configuration for the Account Details Panel
Linking Field: The field that will be displayed as a clickable link when viewing data in the grid or table format. Clicking on this field will open a detailed view.
Logo Type: This is the type of logo that will be used in the grid view. Options are:
Static Logo: A fixed, unchanging image that represents your company or organization.
Field-Based Logo: A logo that is dynamically selected based on the data in a specific field, such as the customer name. If this option is selected, you must provide a field that contains the necessary information to determine the appropriate logo.
Primary Header: The first field that will be displayed next to the company name in the details panel view.
Primary Sub-Header: The field that will be displayed under the primary header.
Secondary fields: Additional fields that will be displayed in the details panel view.
For all the above-mentioned field names, you can pick fields of your choice from the drop-down menu. The field selection is available for Territories (Segments), Teams, and Products.
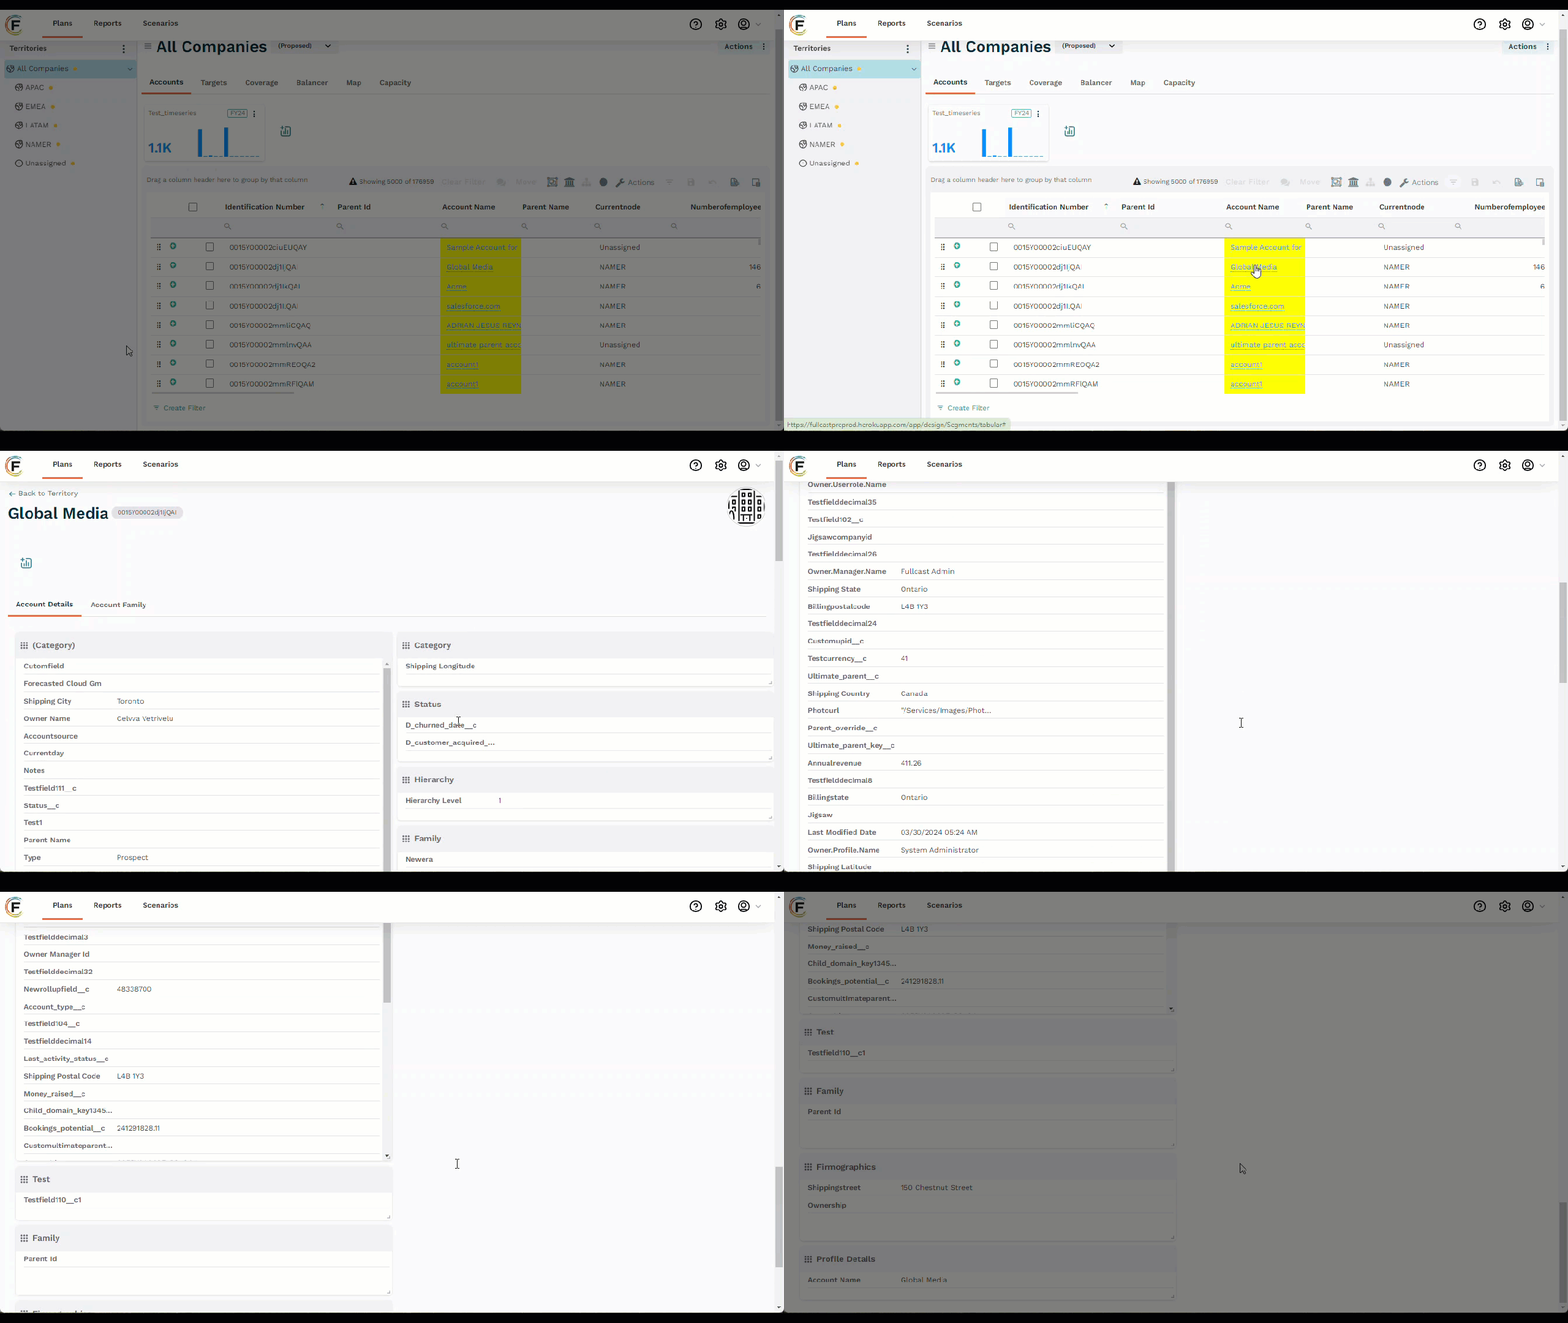
Accessing the details panel and viewing the data.
Grid Settings
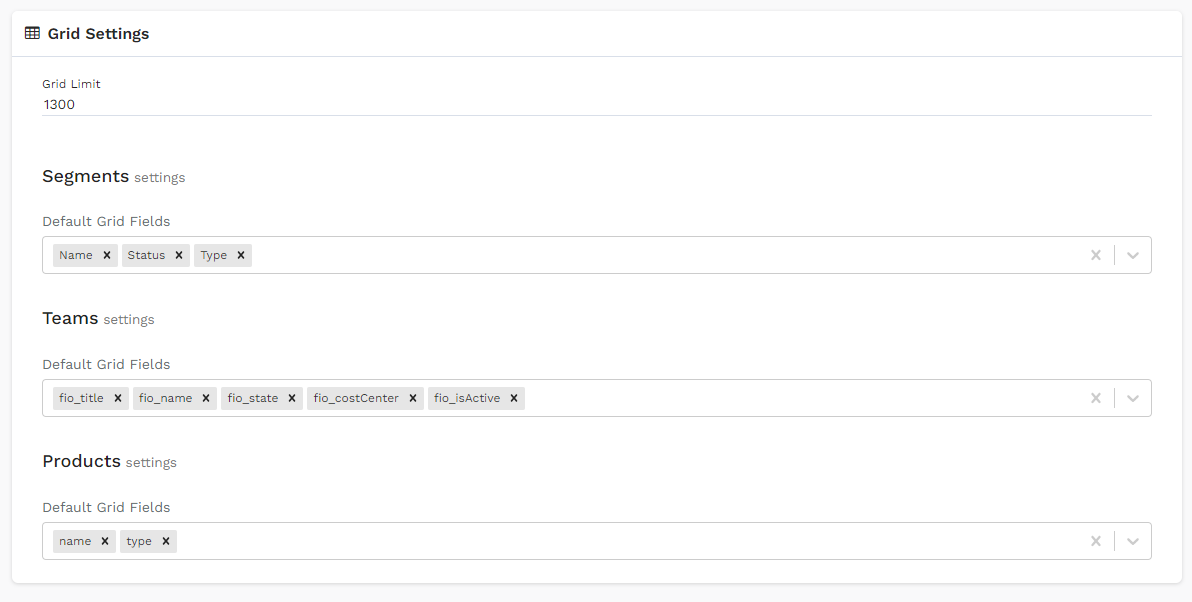
Grid Settings
These settings pertain to the “Grid” (data table view) within the Territories, Teams, and Products modules.
Grid Limit: This sets a limit on how many records are viewable. This setting impacts load time. The maximum allowable limit is 9999.
Default Grid Fields: This setting determines which fields (columns) are visible as a default. We recommend selecting fields that are input to your GTM design.
Account Family Settings
Account Family settings determine whether the “Show Parents Only” action button will display at the top of the grid in the Territories module.

Account Family Settings
Industry Taxonomy
Click the box to enable the Fullcast Industry Taxonomy functionality.
.png)